Session 4: programming the website
files to work on
During this workshop, we will set up the ESP32s webserver, meaning that you can log into the ESP32's wifi network and view a webpage with more information from your sensors.
To do this, we need a few different files:
- index.html - HTML file, where you decide what you want to show on the webpage
- example.css - CSS file, where you decide what you want the website to look like, e.g. colours and sizes
- script.js - Javascript file, which fetches the sensor data from the ESP32, and puts it into the right place on the webpage - you will not edit this file
- session4_yourname.py - Python file, based on your work in earlier sessions, with extra webserver set up code added - you will need to set a password for your ESP32's wifi in here
As there are lots of files to work on, it is important do things in the right order:
- Write and test your HTML and CSS files in Trinket.
- Transfer both of these, and any pictures you have added, to the webdocs folder of your AQM files.
- Upload the changed files to your ESP32.
- Edit your ESP32's password, then run the session4.py file on your ESP32.
- Troubleshoot any errors!
- Log into the ESP32's wifi, then load the webserver page to check it.
Step 1 - edit your HTML and CSS files
For ease of testing, we will use Trinket to edit and test these files - use the log-in provided.
To start, minimise the data table (to make sure that the information from the ESP32 goes to the right place) by clicking the small arrow next to line 14.
If you would like to practice before editing the ESP32's webpage files, you can try out this example.
Edit the text
Text must be contained within tags, which describe whether it is a paragraph or a heading for example.
<h1>This is a heading!</h1>
In your index.html file, edit the headings and text to personalise your webpage. What information do you think is most important?
Edit the colours
Click the example.css tab to switch to the css file.
The instructions given here match the tags in your index.html file - find the section that controls how the headings are displayed, and try to change the colours.
h1 {
  color: darkgreen;
}
To see a list of accepted colour names, click here. The colours can also be written in (R, G, B) format, or as hex codes, for more options.
Edit the pictures
The ESP32 has limited memory, so only small images can be added to it, such as icons.
Search here to download some suitable free images.
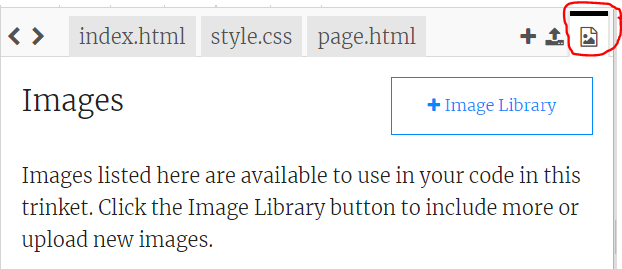
Click the 'image' tab (see picture below), the 'Image Library', then 'Upload New Image'.
Once it is uploaded, you can use the same picture as many times as you like in your project without having to upload it again.
Switch back to the tab your code is in e.g. 'index.html' and add the following code on a new line:
<img src="your_image.png" alt="descriptive text" width="200px">
Change "your_image.png" to the name of your image, add descriptive text and choose the size.
Challenge: The table is formatted carefully, so that the Javascript file knows where to put the live sensor data from your ESP32. For more details, including information on what you can change, click here.
Step 2 - moving your files from Trinket to your main code
Once you have finished editing your webpage files, you need to put them onto the ESP32.
First, download the files from Trinket onto your computer, by clicking 'Share' -> 'Download'.

Open the folder on your computer - it should contain index.html, example.css, and the pictures that you uploaded.
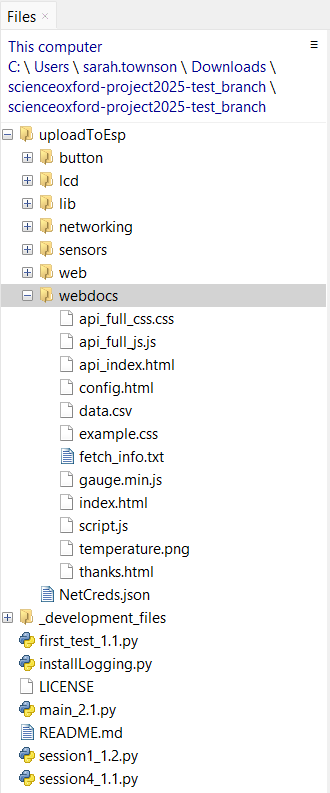
In a new window, open the AQM folder - this will be on the desktop of the computer in our workshop, or on your USB stick at home - and navigate to:
- uploadToEsp
- webdocs
Make sure that you open webdocs, not web!
Drag-and-drop all of the Trinket files into this folder, and allow it to overwrite the original files.
Finally, open Thonny, and check that you can see all of your new files
Step 3 - uploading the new files to your ESP32
Plug your ESP32 into the computer, and connect it to Thonny by clicking the red Stop button on the toolbar - this resets the connection.
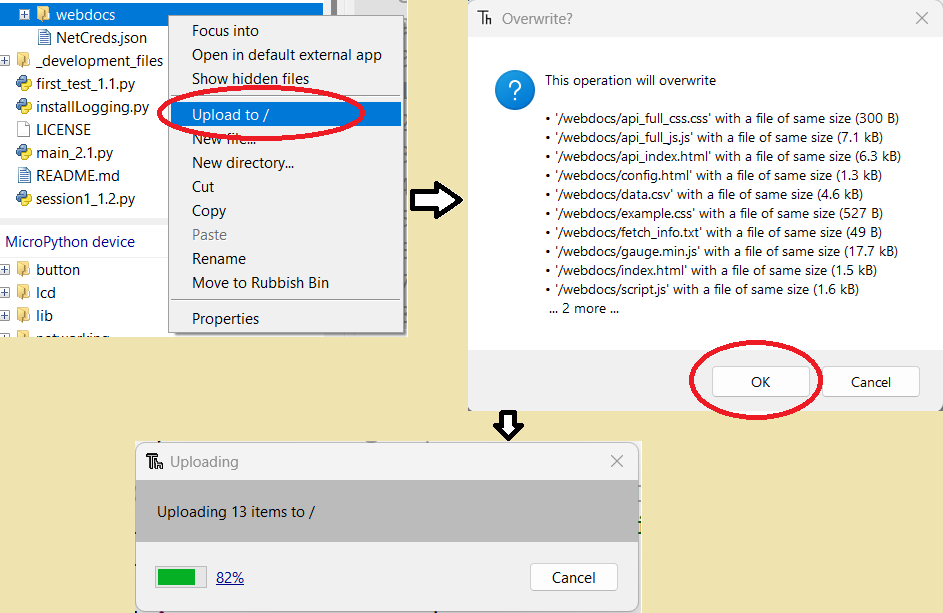
You should now see two sets on files in Thonny - the top are the files on your computer, the bottom are the files on the ESP32.
In the files on the top, right click on the webdocs folder, and click Upload to / - it might take some time, especially if you have multiple pictures.
While you wait, you can assemble your Air Quality Monitor parts - connect your electronics to your laser cut design with nylon bolts.
Step 4 - creating a password, and running your new code
Once your files have been successfully uploaded to the ESP32, you can continue. If the upload fails, check the troubleshooting tips below!
Open session1_yourname.py in Thonny - this is your code from earlier sessions, with some extra set-up code added in.
Scroll through the code to line 137:
password = 'password'
Change the word inside apostrophes to something else - choose something you can type quickly for now, but you can change it later!
Run this code by clicking the green Play button on Thonny's toolbar and look out for any erros!
If the terminal begins showing you the sensor data, then you can skip to Step 6. If anything goes wrong, keep reading for some troubleshooting tips.
Step 5 - checking for errors
Coming soon!
Step 6 - logging into your ESP32
While your ESP32 is running its code, it is broadcaseing its own WiFi network.
If you are in our workshop, you can borrow a tablet to test it, or you can use your own device.
Follow these steps to see your webpage:
- Make sure your ESP32 is plugged in, and running the code - you should see sensor data in the terminal on Thonny.
- On your ESP32, click the button twice quickly (double-press) - the network information should show up on the screen.
- On a tablet or phone, open Wifi settings.
- Disconnect from the current Wifi.
- On the list, find the network that matches the one shown on your ESP32's screen - it will start ESP_. If you are in our workshop, you will see lots of devices, make sure you click on your own!
- When prompted, type the password you set in your code.
- Once connected - it will complain that there is no internet, that is okay! - open a web browser.
- Navigate to the numbers shown on your ESP32's screen, e.g. 192.168.4.1.
- Check out your webpage!