Add Pictures to your Website
These instructions show you how to add pictures into your project.
These instructions show you how to add pictures into your project.
You can create an image yourself, using software on your device, or save an image to your computer after searching online.
When choosing pictures, it is important to make sure that you have permission to use it, and it is always a good idea to thank whoever created it (if it does not belong to you), for example with a link to the website!
By using the link below to search for pictures, you will make sure that you only find images that are Copyright Free, so you have permission to use them for education purposes.
If you want to create a project to share online with people other than your family, you will need to be even more careful about how you choose your images.
Remember, do not include any photos of yourself or anyone you know in your app, as the information stored on Trinket is not private or secure!
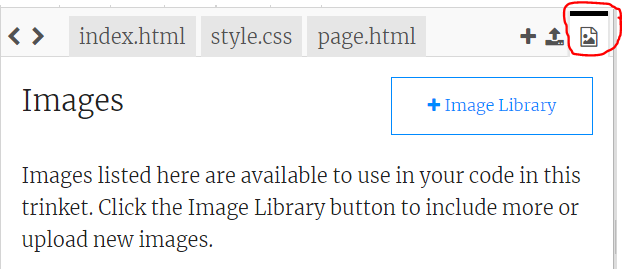
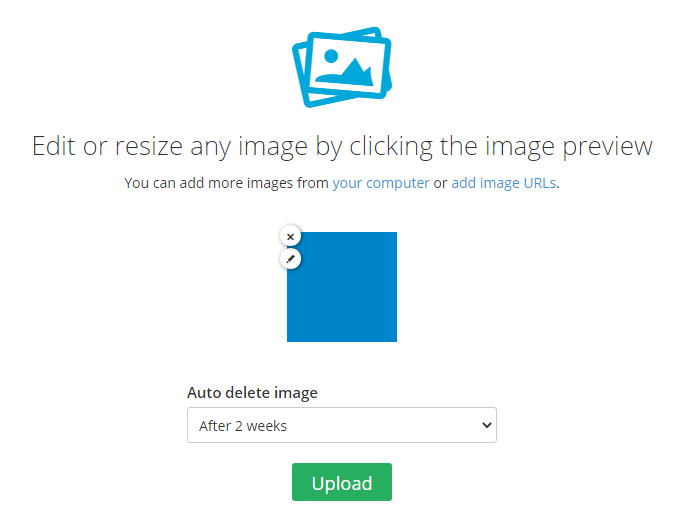
Click the 'image' tab (see picture below), the 'Image Library', then 'Upload New Image'.
Once it is uploaded, you can use the same picture as many times as you like in your project without having to upload it again!
Switch back to the tab your code is in e.g. 'index.html' and add the following code on a new line:
<img src="your_image.png" alt="descriptive text" width="200px">
Change "your_image.png" to the name of your image, add descriptive text and choose your size.
It is slightly more complicated to use images if you are not logged in, as you cannot upload them into Trinket.
Visit imgbb and upload your picture. Choose how long you want to keep the picture for (the maximum is 1 month), then click Upload.
Once the image has successfully uploaded (this might take a little while if it is a large picture!), change the Embed codes to HTML full linked
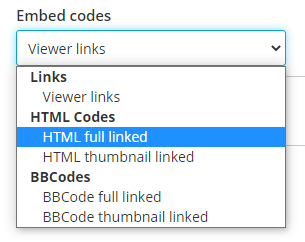
Copy the given code and add it to your own program in the correct place.