These instructions discuss the properties of some of the materials you could use for your robot's body, and describes how to create your design by hand or on a computer.

Cardboard
High Impact Polystyrene (HIPS)
Medium Density Fibreboard (MDF)
Plastic bottles
Corrigated plastic
Step 1 measure your robot
Measure your robot's length, width and height, and write the measurements down.
This is the minimum size you will need to design your body.
Step 2 understanding nets
A good way to design your first prototype is to design a net.
A net is a flat (2D) shape which you can fold up to make a 3D shape.
You can see an animation of a net turning into a 3D shape on the Maths is Fun website.
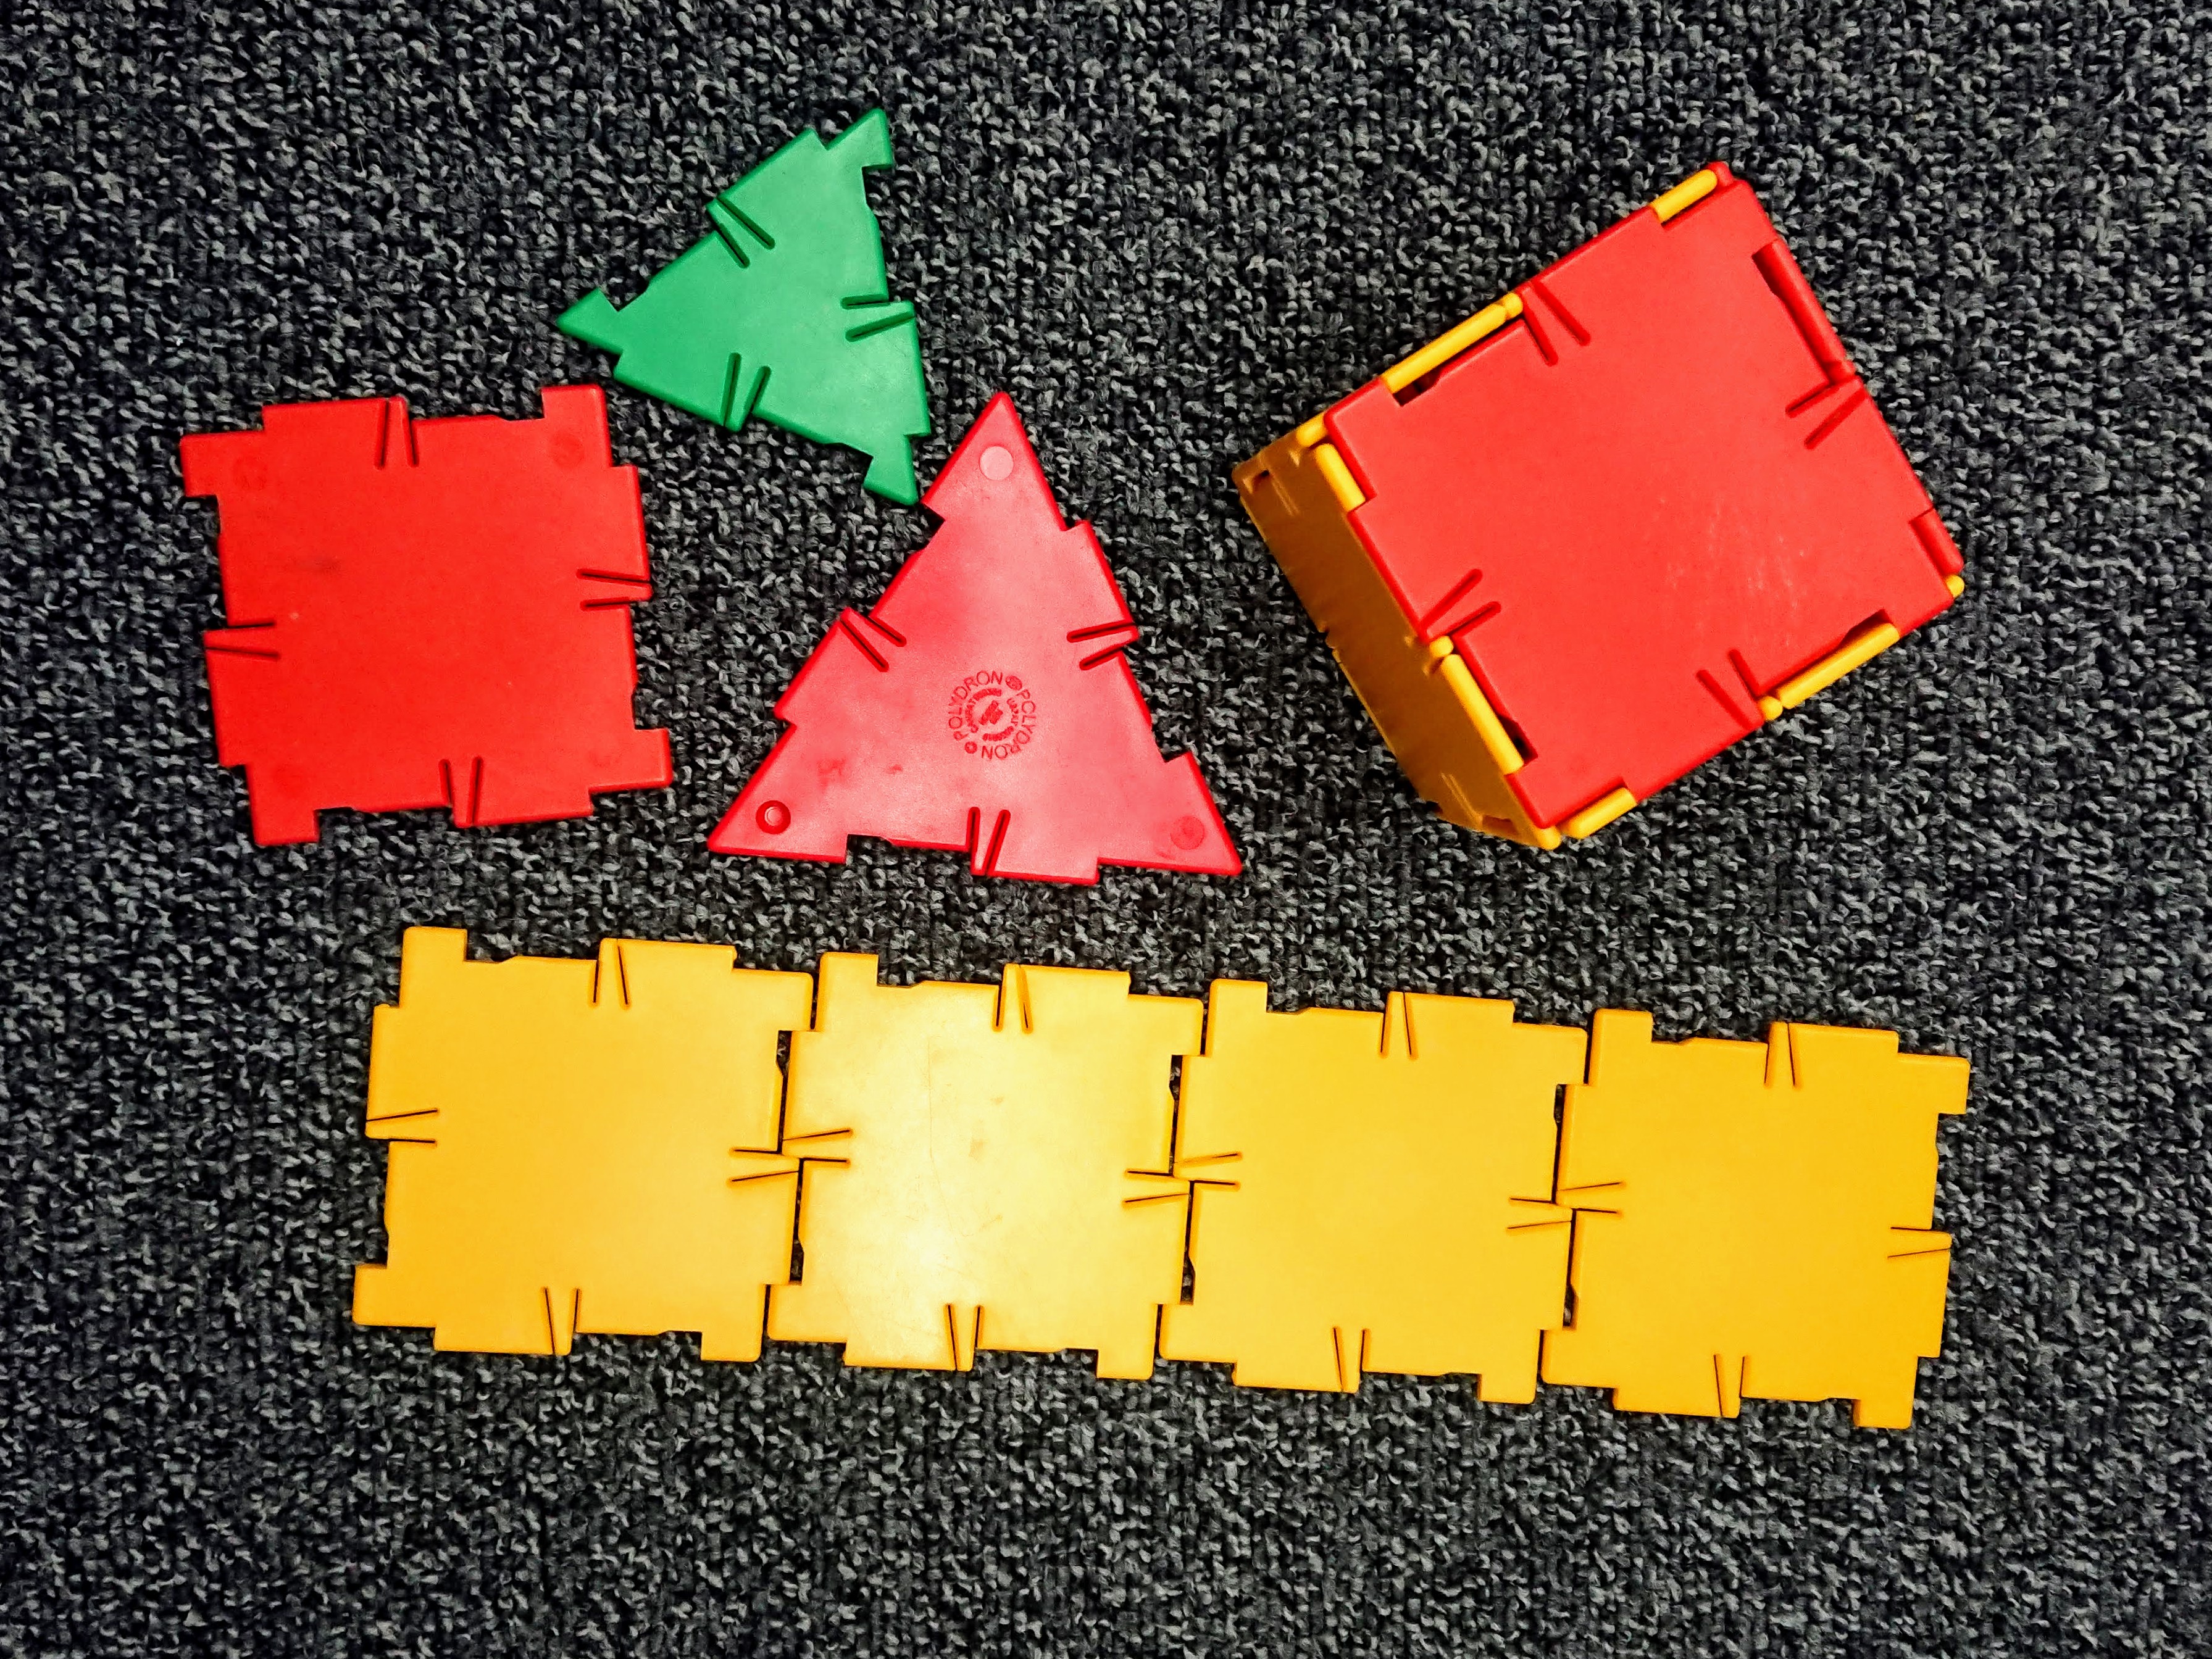
If you are in a workshop with us, have a go with the Polydron shapes to see what kinds of designs you can make!
Step 3 creating your prototype
To create a box that fits your robot, you need to think about all the sides, and connect them togther as a net.
You do not want to enclose your robot inside a cube, as then the wheels won't be able to touch the ground!
So to start with, try making a box with two open sides that your robot fits inside.
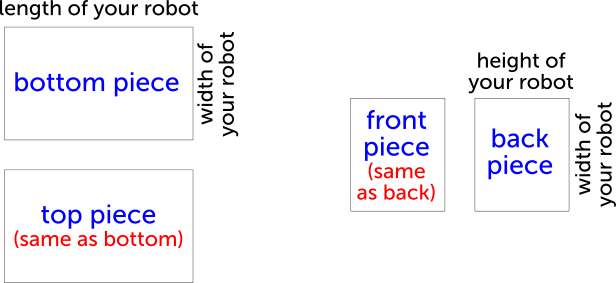
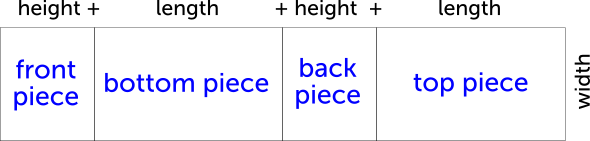
The one measurement all of these pieces have in common is the width of your robot, so you can connect them all together to make a net.
Create a net using your own robot's measurements on a piece of card.
Cut around the outside, and score the inside lines to create a bend.
Iterate your design until you are happy with it.
Get a piece of your chosen material large enough for your design.
Check whether your material will allow you to score lines or not!
If it does, cut out the outside of your design, and score the inside lines. Then assemble around your robot.
If it does not, cut the outside and the inside lines, so all of the pieces are seperate. Then use tape to assemble around your robot.
Get a piece of your chosen material large enough for your design.
Use Tinkercad to recreate your design - paying attention to the measurements.
If this is your first time designing for a laser cutter, have a look at our instructions first!
When you have finished, you will have an .svg or .dxf file, which you can bring to us for laser cutting.
Get a piece of your chosen material large enough for your design.
Use Design Space to recreate your design from shapes - paying attention to the measurements.
If this is your first time creating your own design on Design Space, talk to a workshop leader or check out the Cricut tutorials first!
If you want to use score lines to fold your net, instead of cutting each piece seperately, you will need to add score lines to your design.
After placing your score lines, click on all the pieces of your net except the score lines and weld them together.
This will merge your shapes, making sure that the Cricut machine does not cut the inside lines.
When you have finished, you will have a Design Space project, which you can bring to us to get cut on the Cricut.