On this page you will find example code and instructions for October 2019's Creative Computing Club, Robochallenge.
Ignore these instructions unless something has gone wrong!
The initial joystick code can be found here.
The initial robot code can be found here.
Copy and paste the code into the Mu editor.
Edit the radio.config instructions on line 8 to match your robot.
These instructions will help you to program the robot's motors.
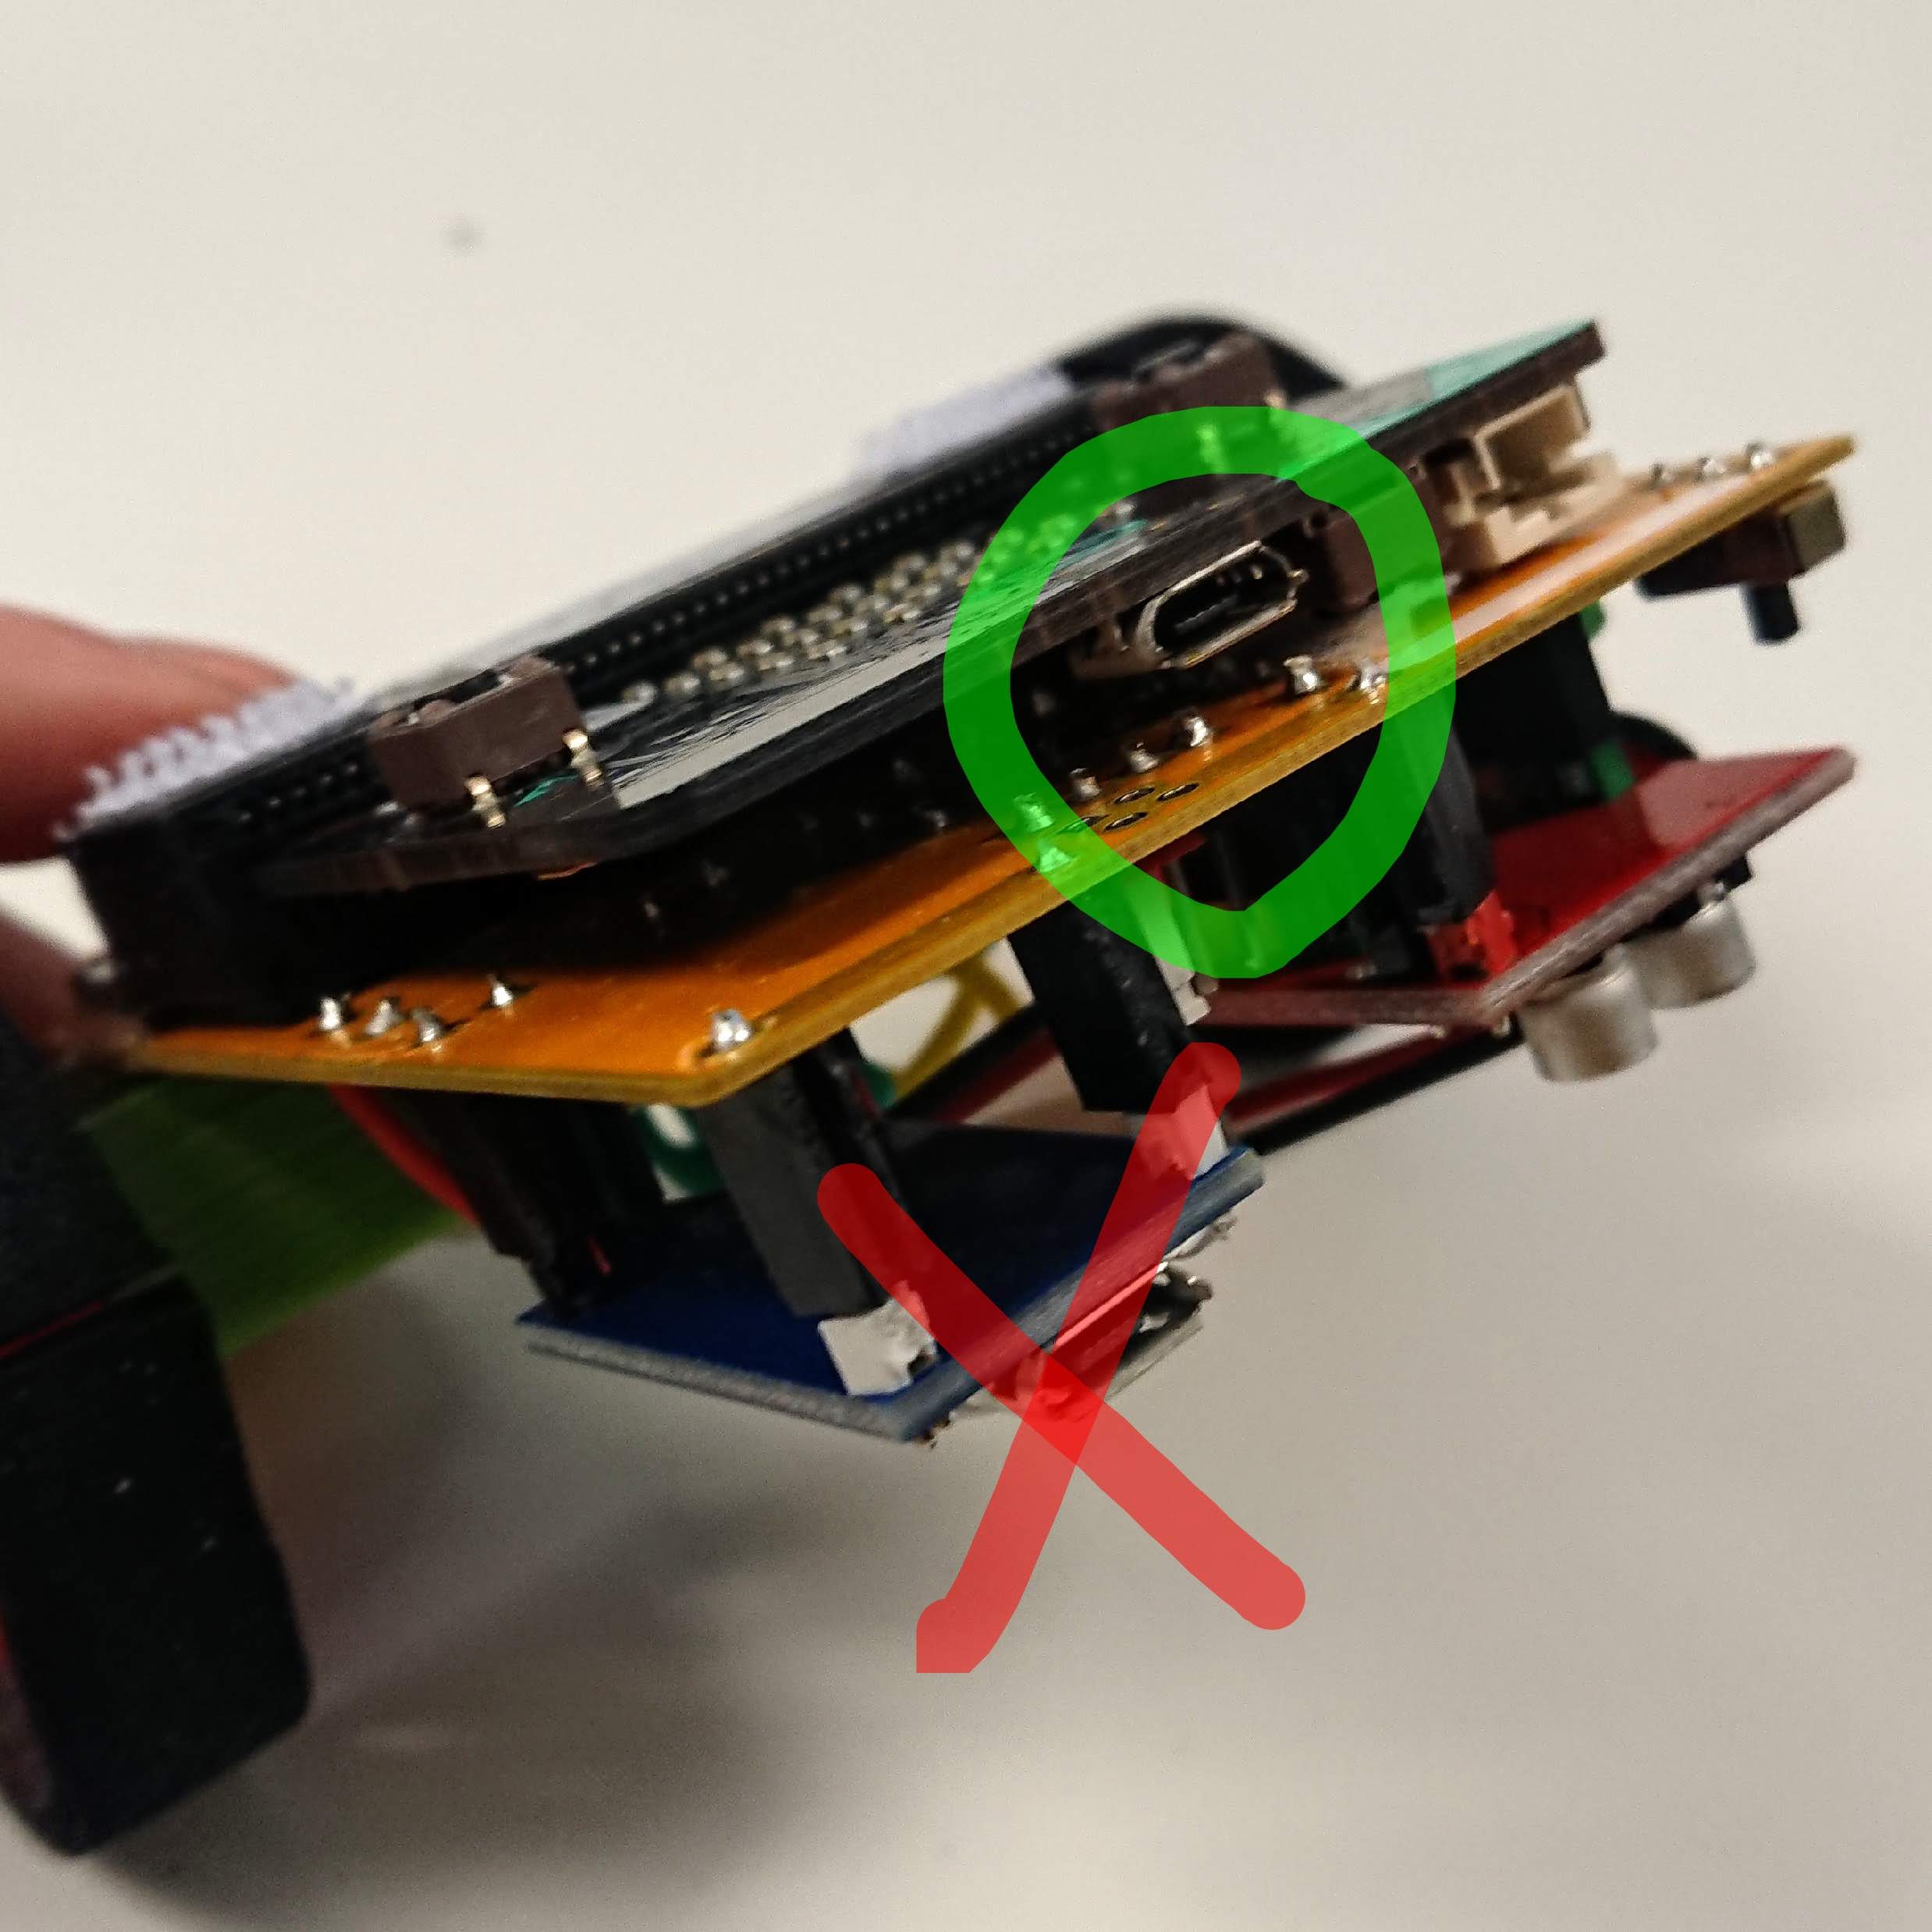
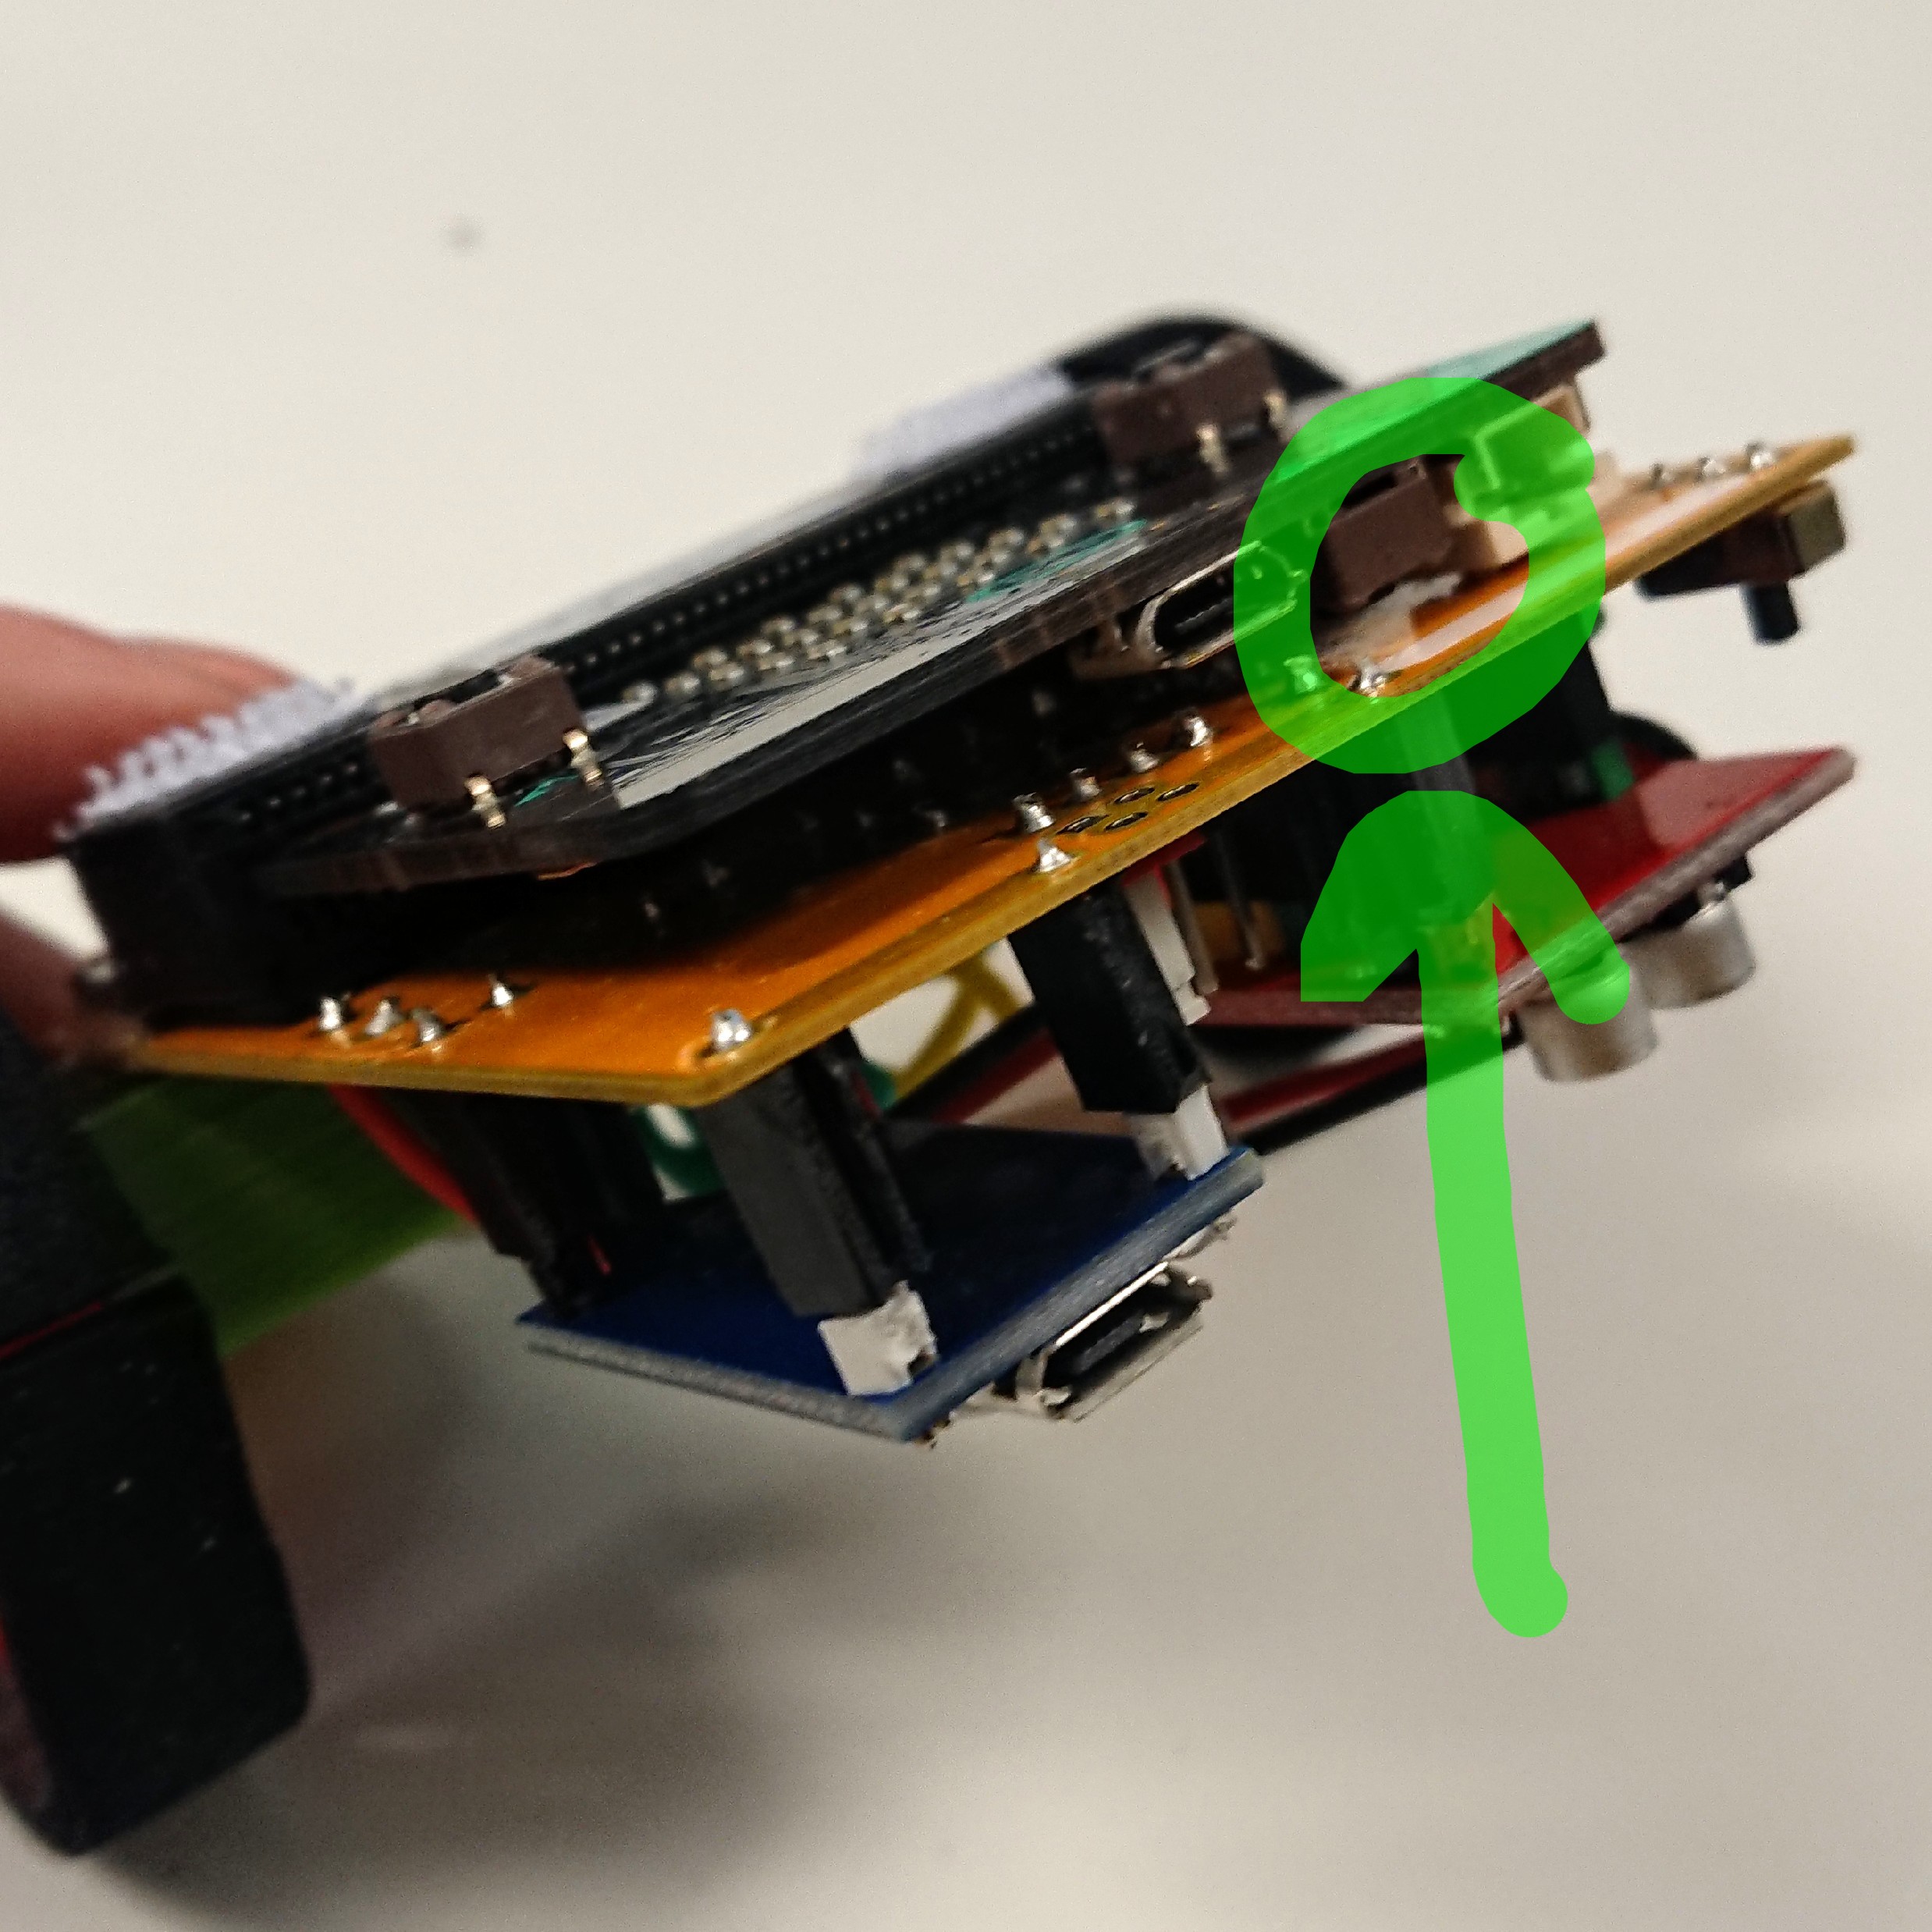
Plug your micro:bit into your computer. There is another USB port on the robot, use the one on the micro:bit itself!
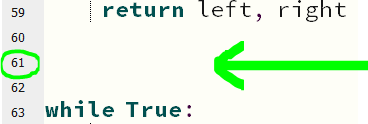
In the starter code on your computer, find a blank line before while True, for example line 61.
Add the following code on this line:
display.show(Image.HAPPY)
Press the Flash button in Mu and wait for your code to copy over to your micro:bit.
What happens?
What other images can you find?
Some other code is running on the micro:bit, inside the while True loop.
Press the REPL button in Mu to open a terminal.
Now click the reset button on the micro:bit. This can be fiddly, so ask an adult for help if you need to.
What do you see in the terminal?
Turn on your joystick, by flicking the switch on the right-hand-side.
What do you see in the terminal now?
What happens when you move the joystick?
The two numbers you are seeing, can be used to control the left and right motors.
This information is being sent, over the radio, from your joystick.
But it is not yet in a format that the motors can understand, so it needs converting.
Edit the code inside your while True loop, so that it looks like this:
while True:
    message = radio.receive()
    if message is not None:
        message = cut(message)
        left = message[0]
        right = message[1]
        drive(left, right)
Make sure that you only have one while True loop.
The above code will replace what was already there.
How does this new code work?
None, it ignores it. This means that it will not get confused if it doesn't get any messages, for example if your joystick is turned off!cut function is applied to the message. This function is further up the code. It splits the message into two numbers, and tells the micro:bit that they really are numbers instead of text!left is set to the first half of the message - message[0]. Remember that Python starts counting from zero!right is set to the second half of the message.drive function is used, to turn on the motors, using our new values of left and right.while True loop, when it has turned on the motors, it will go back to the top of the loop, and check what the next message the joystick has sent is.Flash your new code onto your micro:bit.
Debug any errors - you may get an error message scrolling across the micro:bit's screen!
When you are confident in your code, unplug your micro:bit from the computer.
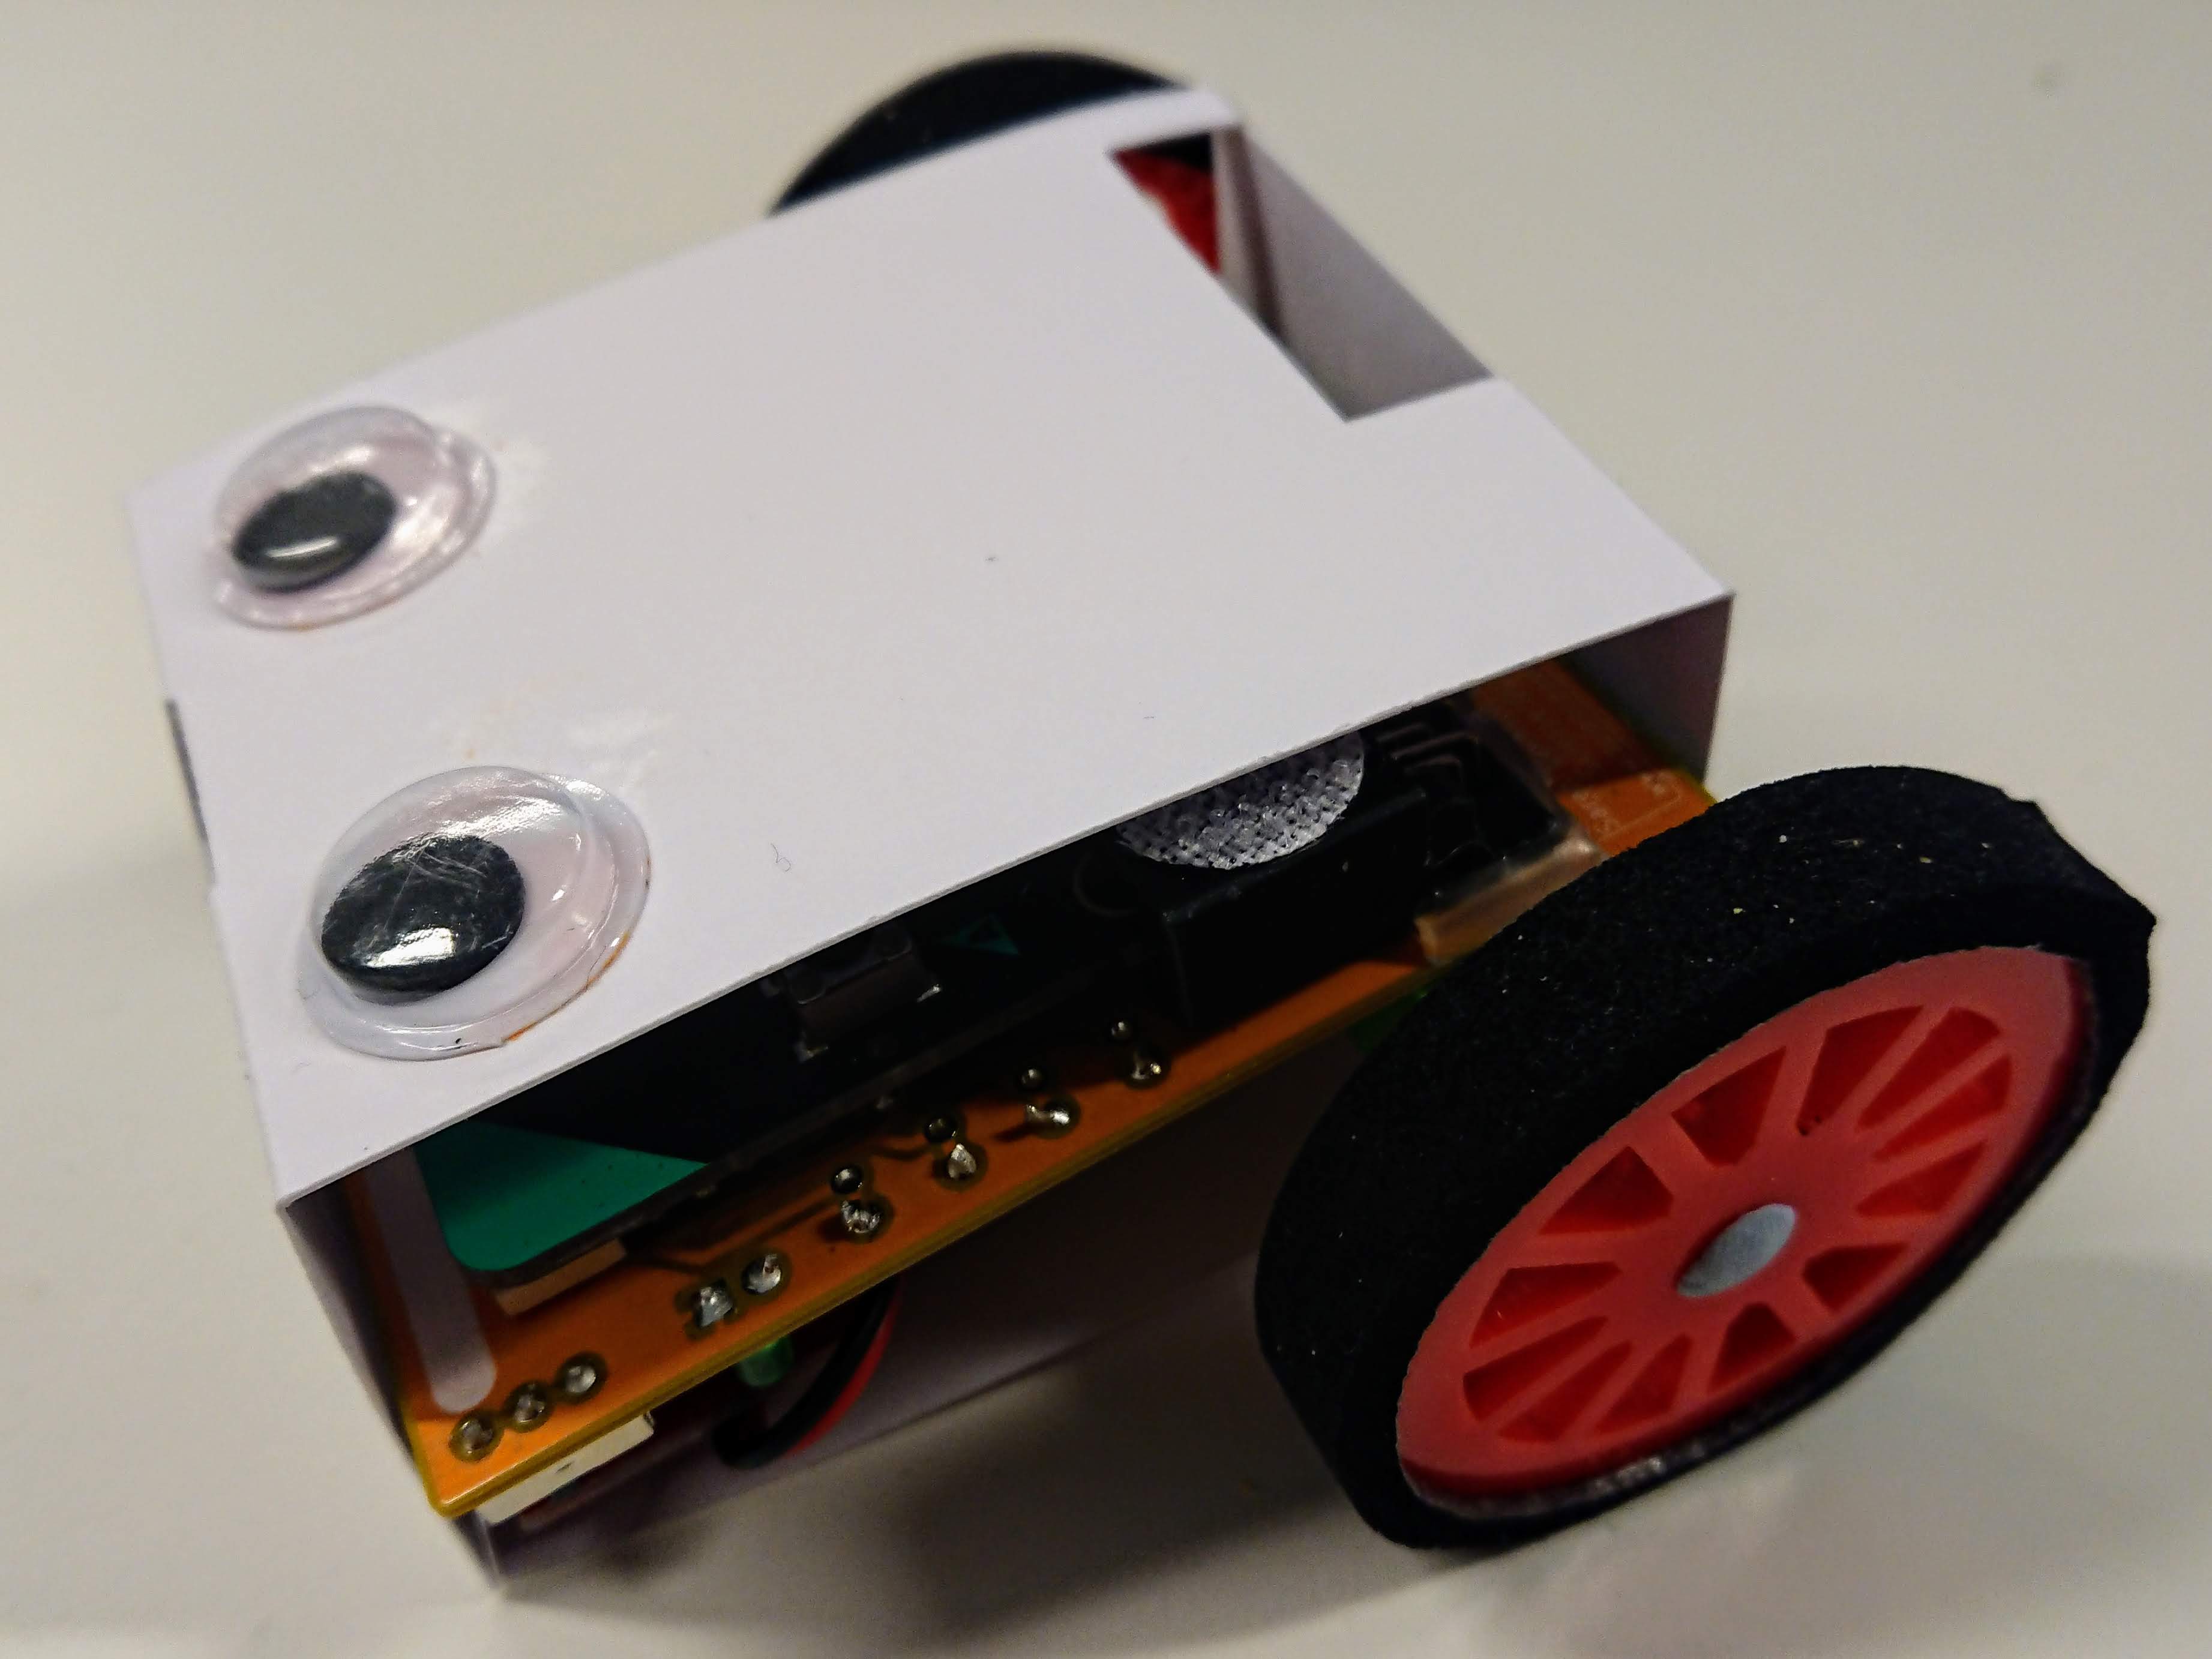
Attach the cardboard body to your robot - this will protect the electronics before you start to drive it - and add some identifying features, such as your name or a cute face.
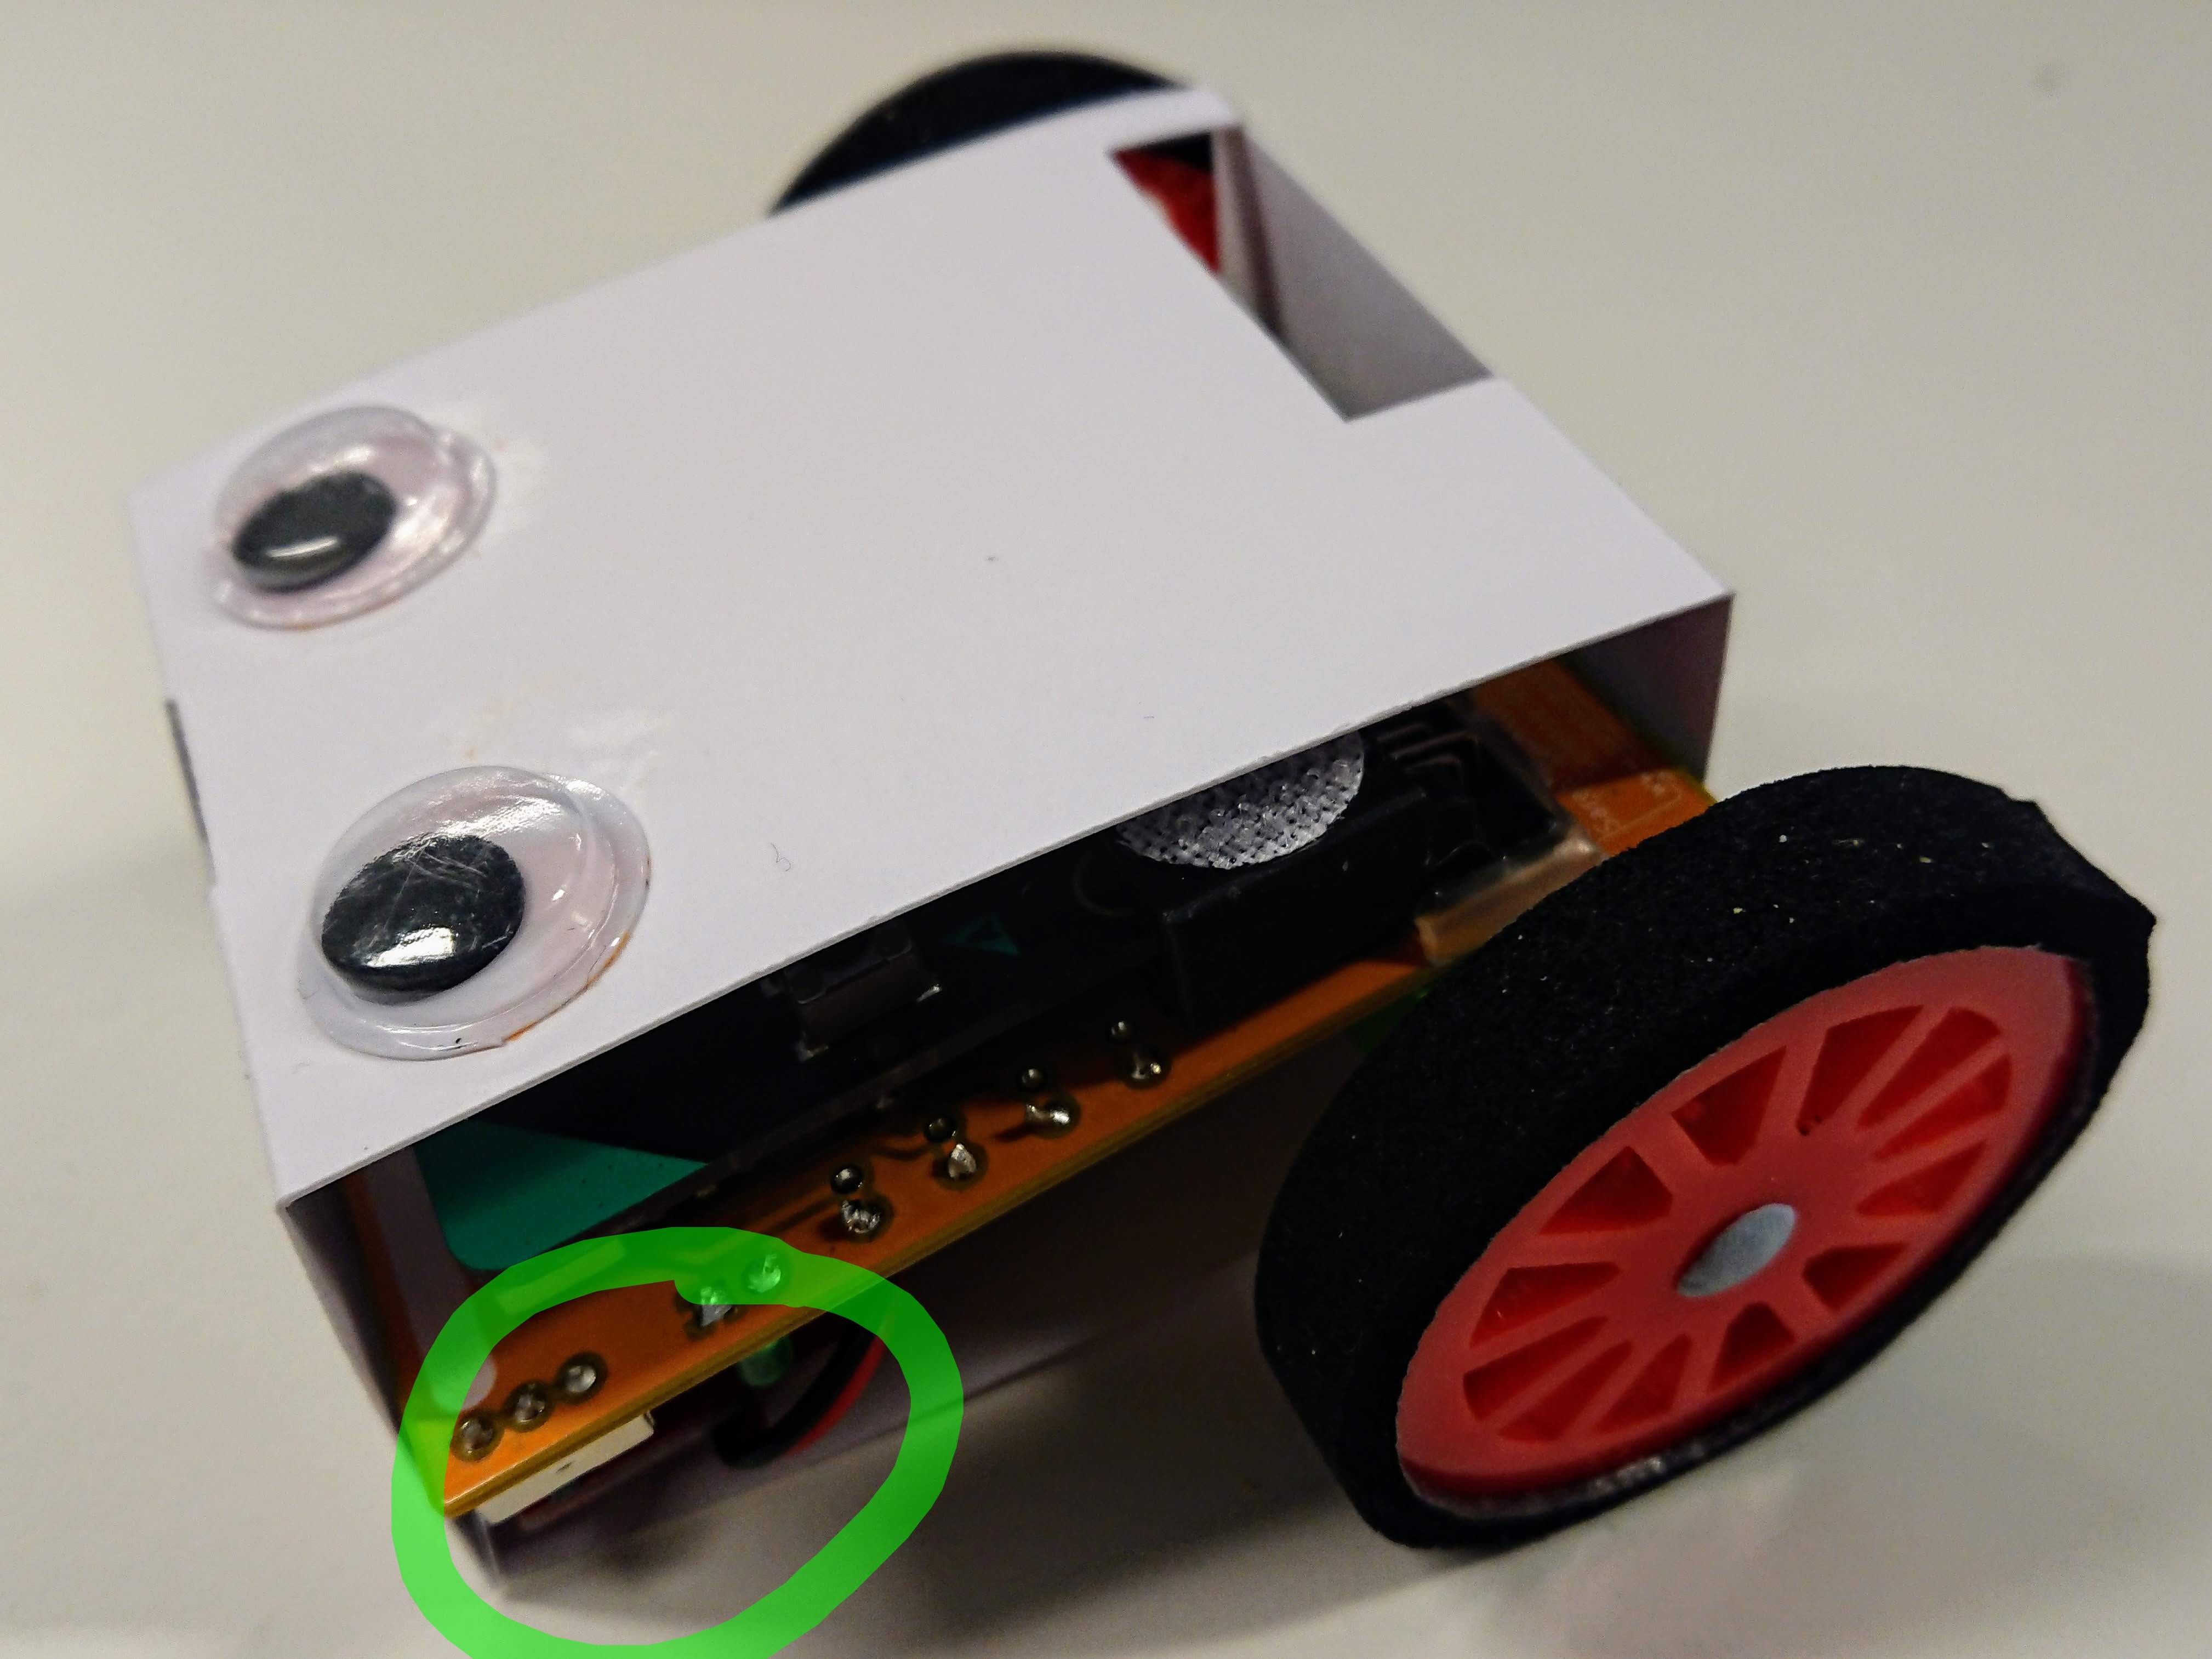
Turn on your joystick, then turn on your robot by flicking the switch underneath - a light will turn on next to the switch.
Put your robot on the ground and try to drive it with your joystick.
Does it work as you expect?
Do you need to do any debugging?
Choose an option below to find some instructions, or work on your own ideas.