Resources for the 'Musical Microbits' Creative Computing Club.
During this workshop, you will create a musical instrument by coding a micro:bit to bang, rattle or ring an object.
This page recaps what we discussed as a group.
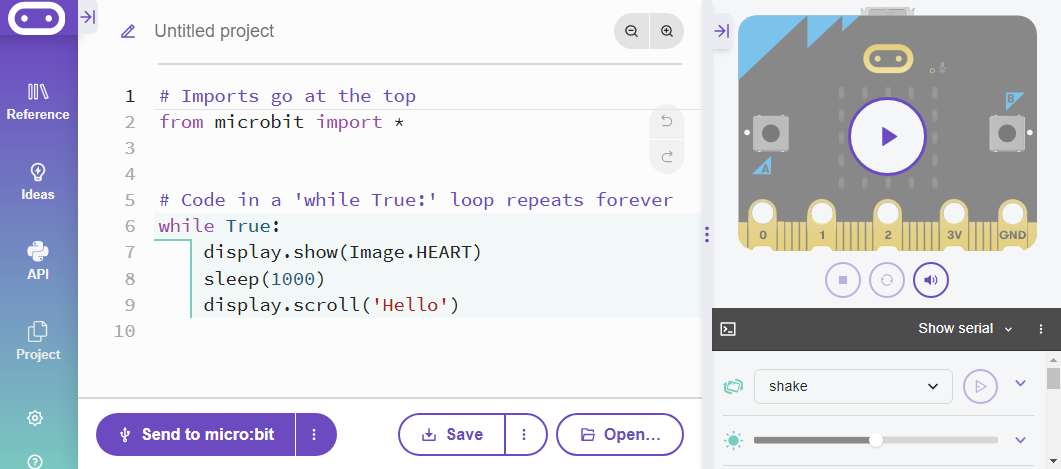
Open the new Python editor by visiting python.microbit.org/. Your screen will look something like this:
Edit the code on the screen, then flash it to your micro:bit to see the changes.
Try:
You have added inputs, to control when your code will run. Now you are going to add a new output - a motor.
Edit your code, so that it looks like this:
while True:
    if button_a.was_pressed():
        pin1.write_analog(35)
        sleep(1000)
        pin1.write_analog(85)
        sleep(1000)
You can keep your original code in there as well if you like, but be careful of the indentation, and think about the order your code will run in.
What this new code does, is send a signal to pin1 of your micro:bit - one of the gold teeth on the bottom.
Connect your motor to the micro:bit and see if your code works. Does your micro:bit wave to you?
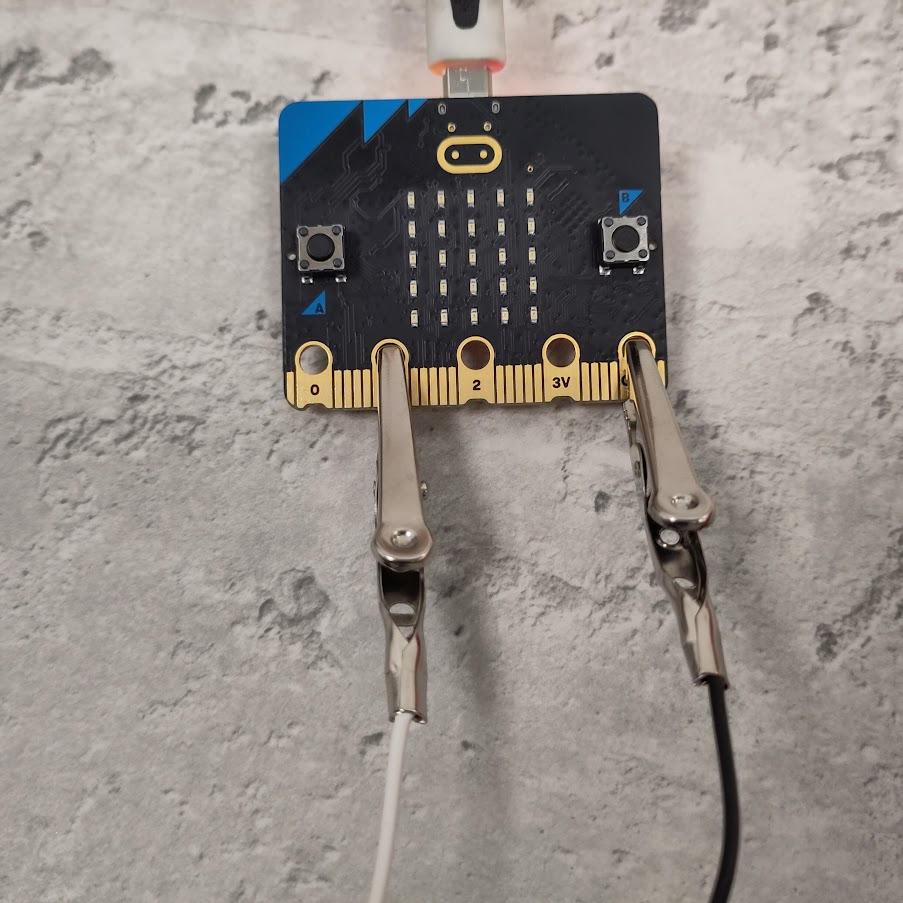
For more details about this circuit, click here.
Challenge: You can make this code more efficient by using variables. Try setting a tempo variable, and using this inside sleep. You could even extend this further by letting the micro:bit randomly choose the tempo for you! For some help to implement this challenge, click here.
Now we will add musical notes into the program - to start with, we'll time the notes to play whenever the servo motor moves.
Firstly, add this line above your while True loop:
import music
This line is needed to use the music note code.
Use this syntax to add a musical note:
music.play('c')
To add a 'C' when the servo moves one way, and a 'D' when it moves the other, the code would look like this:
while True:
    if button_a.was_pressed():
        pin1.write_analog(35)
        music.play('c')
        sleep(1000)
        pin1.write_analog(85)
        music.play('d')
        sleep(1000)
Challenge: to expand on this code, take a look in the Sounds section of the Reference menu. Could you make a list of notes to make a whole tune?
Now add a physical instrument for your servo motor to hit!
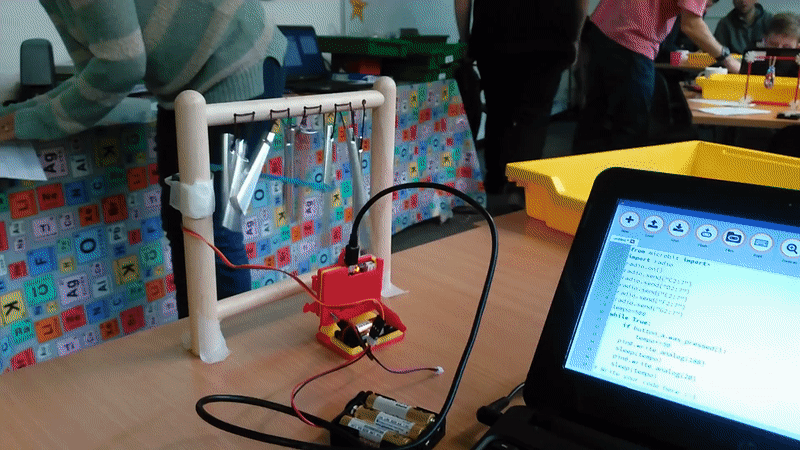
To get your project working you will need to:
Challenge: Can you work with someone else to make an orchestra? Discuss your timings to make a good tune!