Optional Work 2: wiring diagrams
If you would like to achieve a Silver CREST Award, the suggestions below will help you to extend your robot project.
Remember to save copies of your work and/or take photographs, to use in your final report.
circuit diagrams
To learn more about circuits, see the BBC Bitesize guide.
To practice creating your own circuits, try the Tinkercad Circuits tutorials.
drawing a circuit diagram
The circuit information in the BBC Bitesize guides uses lamps instead of LEDs. Lamps are easier to use, as is doesn't matter which way round they are connected in a circuit.
For soldering small circuits, LEDs are much easier for us to use!
Here is an example of a circuit diagram using LEDs - it shows the circuit of the keyring board you made during the workshop.
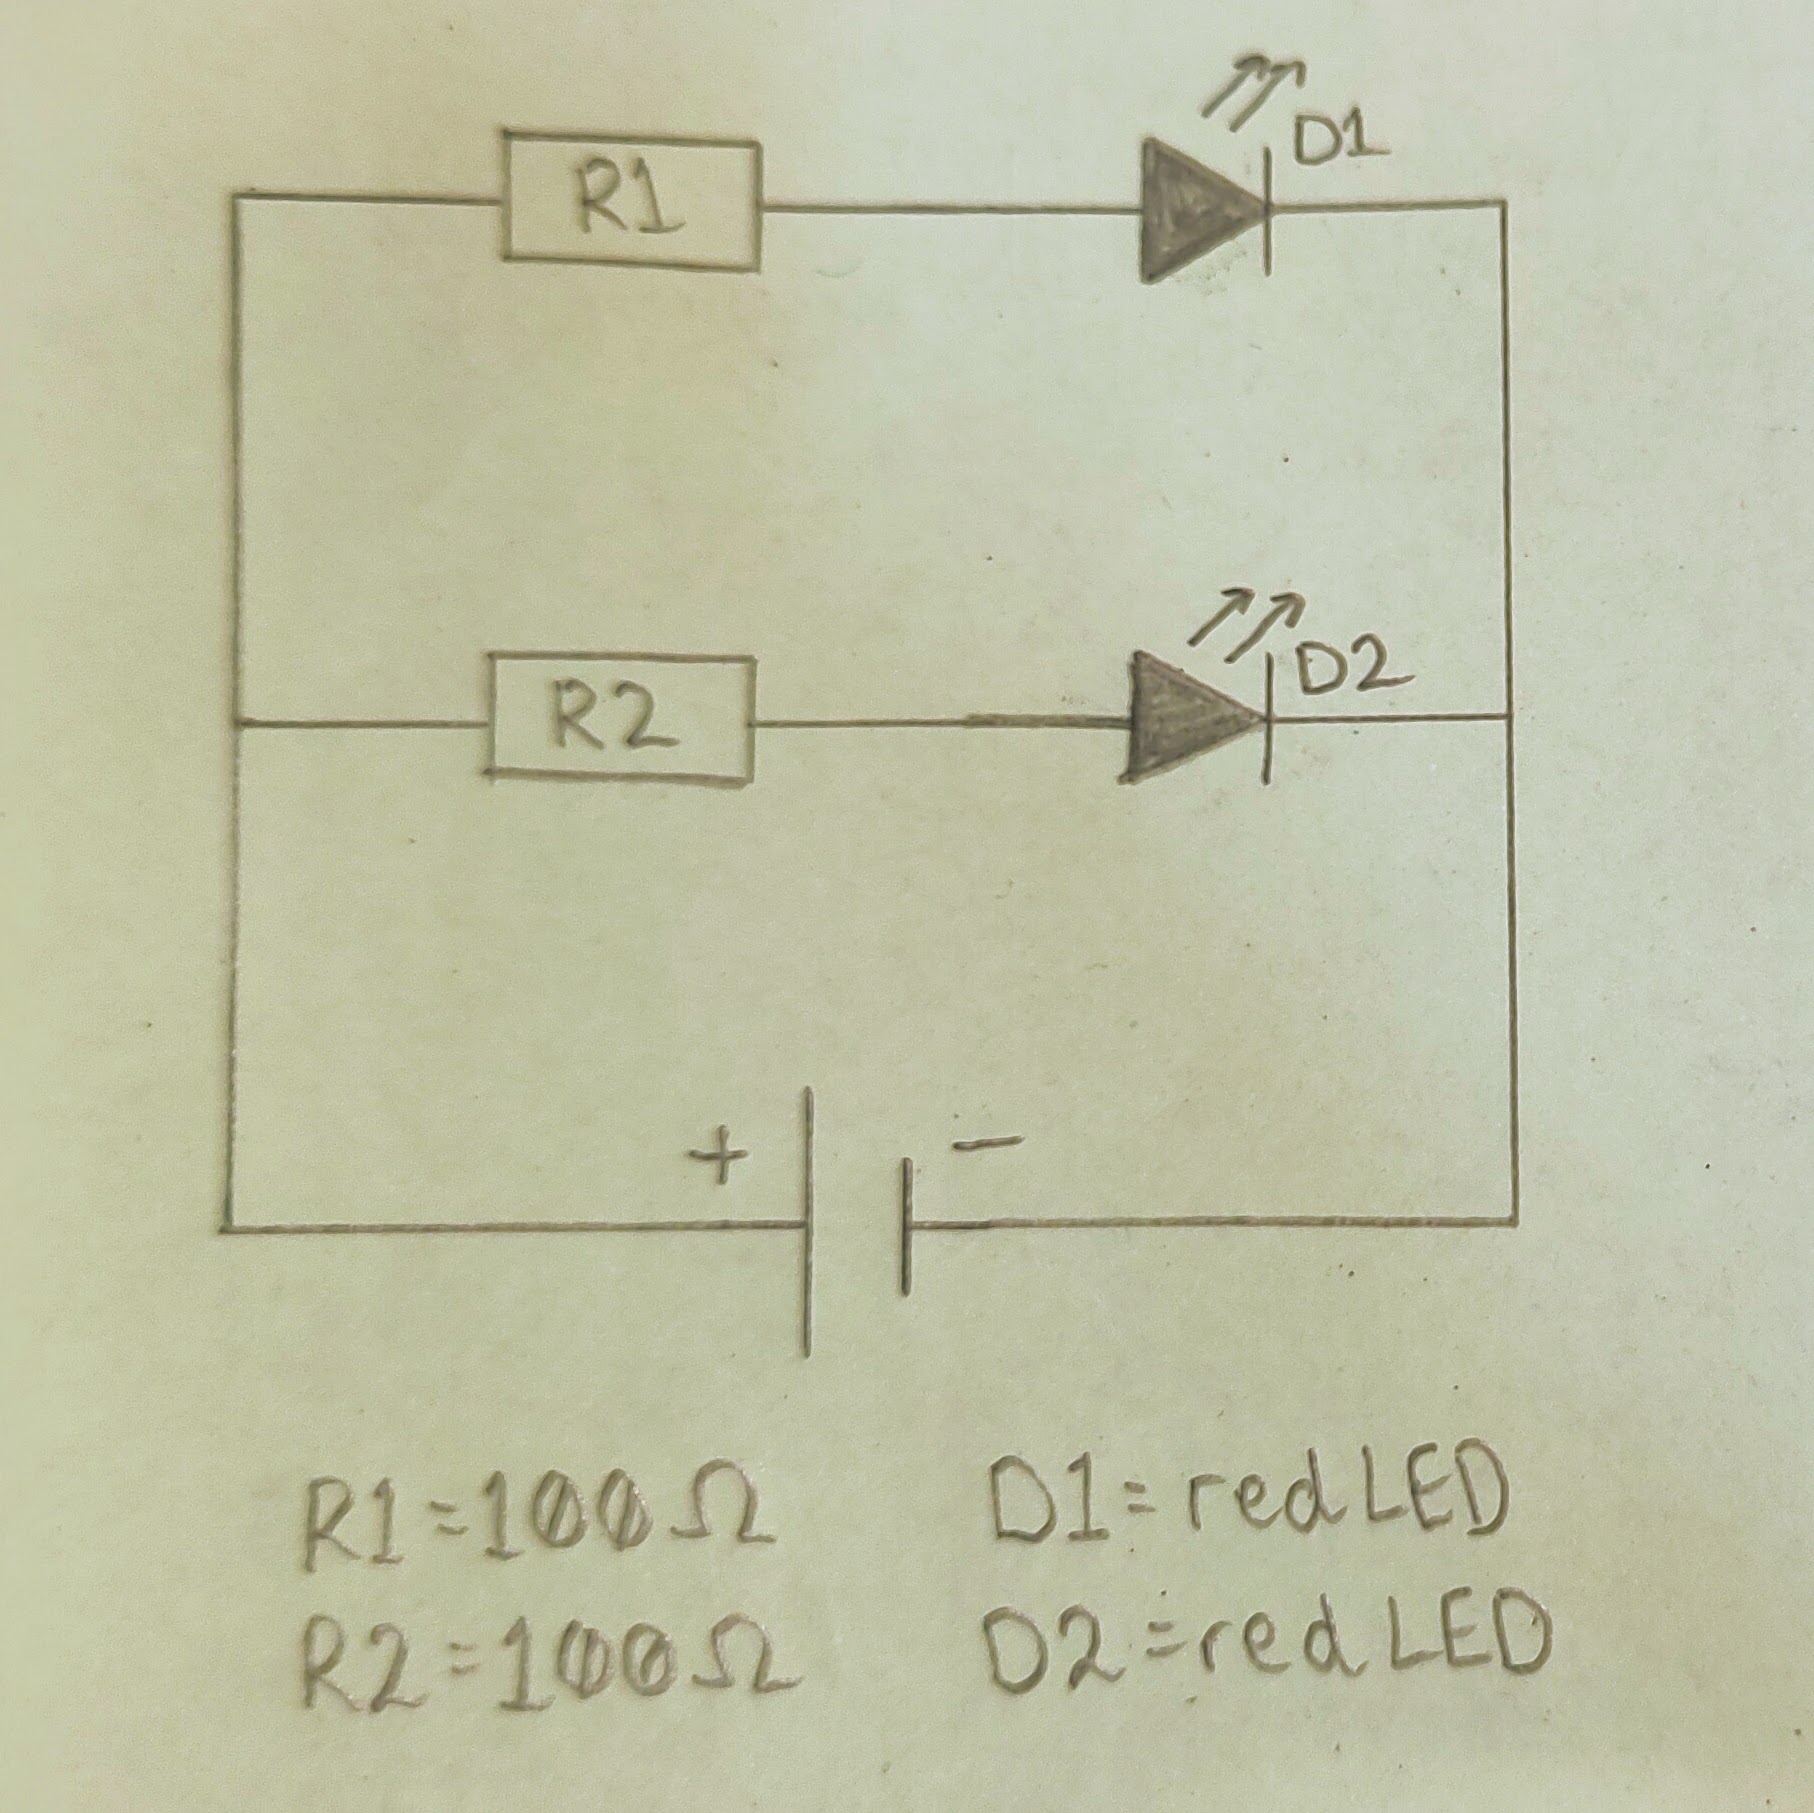
Draw your own circuit diagram of an LED circuit, using three or more LEDs.
soldering
If you have soldering equipment at home, at school, or in an after-school club, you can practice with other kits.
Let us know if this applies to you, and we will give you another practice kit to work on.
Click here for a guide to identifying components and where to place them on a new PCB.
wiring ultrasonic sensors
The ultrasonic sensors we are using are called HC-SR04. They have four pins to connect into your circuit.
- Vcc = power in, positive side. They need 5V and so this is connected to the blue 5V section of your power board.
- Trig = trigger pin; this is the output and will send out a pulse of sound when activated. It is connected to the micro:bit (our code uses pin0).
- Echo = echo pin; this is the input and will receive the echo of the pulse of sound. It is connected to the micro:bit (our code uses pin1), but needs a 1k resistor first to protect the micro:bit.
- Gnd = ground, negative side. This is connected to the GND section of your power board.
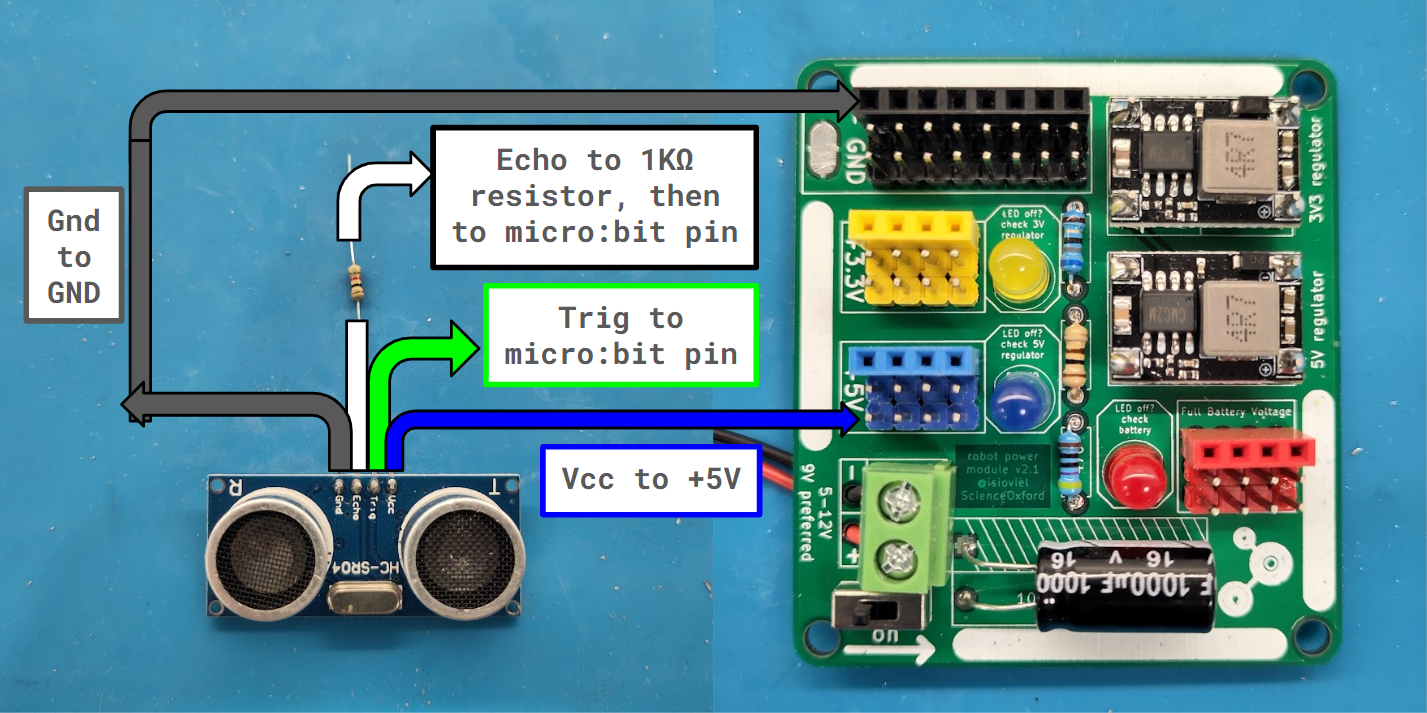
Can you draw your own version of this picture, for two ultrasonic distance sensors instead of one?
other components for your robot
In the future, once your robot is built and programmed, you might want to add extra things to it.
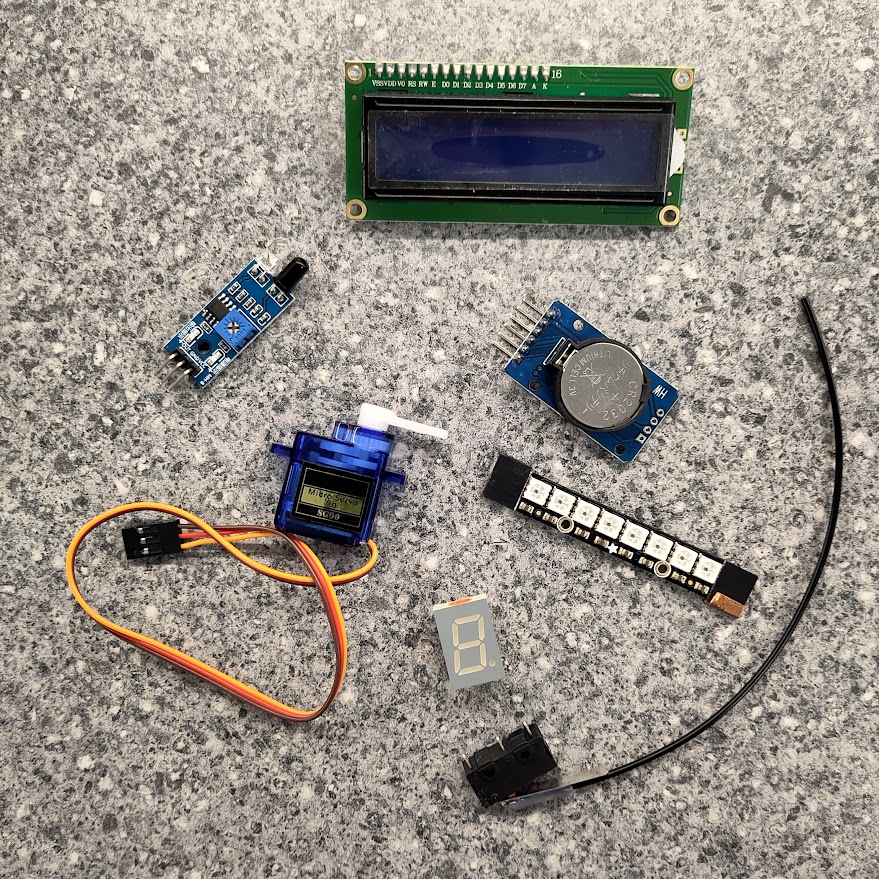
Some examples include:
- Servo motors
- LEDs
- Neopixels
- Infrared line following sensors
Research some of these components, or any others you have heard about.
- What do they do?
- How could they improve your robot?
- What voltage do they need to work properly?
- Has anyone connected them to a micro:bit before? Do they have any advice on how to connect it?
Pick your favourite component, and draw a diagram of how to connect it to your robot.
If you bring your research to the next club session and discuss it with us, we might be able to give you what you need to add it your robot.