Resources for the 'Robot Buggy Arena' Creative Computing Club.
During this workshop, you will program a micro:bit robot and joystick, then test your coding and driving skills in our arenas!
This page recaps what we discussed as a group.
To skip to the examples and ideas, click here.
Open the Mu editor on your computer. If there is code on the screen, start a New program from the menu.

Type these two lines of code into your blank window:
from microbit import *
display.show(Image.HAPPY)
Plug your micro:bit into the computer, then click Flash:

Some code should be running on your micro:bit!
If you get a message scrolling across the micro:bit's screen, this is an error message!
Debug your code, then click Flash again to test your changes.
Once your code is working - change it!
Instead of HAPPY, can you think of another Image the micro:bit could show on its display?
Choose your robot, and sit it on the stand so that the wheels are not touching anything - this way you can test it without it driving off.
Make sure that your robot it not going to drive away, then turn it on by flipping the black switch on the top.
Now, press button 'A' on the robot's micro:bit - what happens?
The robot's wheels should turn - both forwards, in opposite directions, then both backwards - if this does not happen, check the following:
Download the robot starter code if it is not already open.
Unplug the micro:bit you used before, and plug the robot's micro:bit in instead.
Before adding in joystick control, you need to make sure that nobody else can control your robot!
Look on the front of your robot - by its name will be a number.
Find the below line in the robot code, and change channel=7 from 7 to your robot's number, then flash the updated code to your robot's micro:bit.
radio.config(channel=7, group=0, queue=1)
Test your code - does the robot still work the same as it did before?
Unplug the robot from your computer, and plug in your other micro:bit.
Push this micro:bit into the top of your joystick.
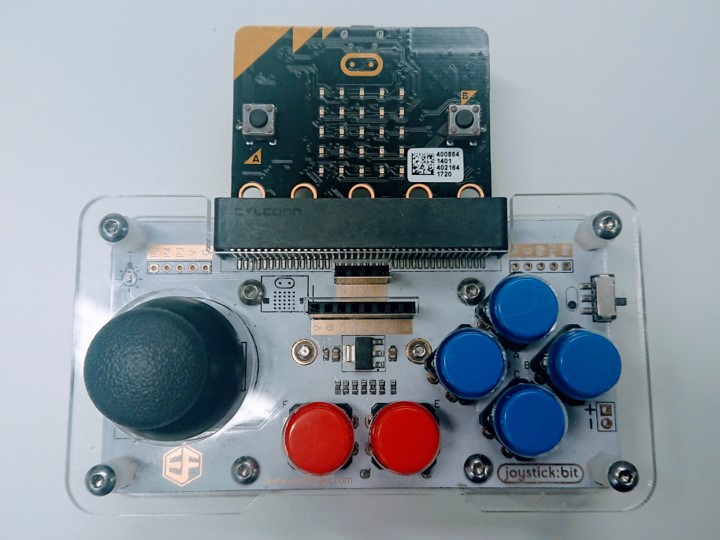
Download the joystick starter code if it is not already open.
Flash the joystick code to your micro:bit, then click the REPL button in Mu:

Press the reset button on the back of your micro:bit - you should now see numbers scrolling in Mu. What happens when you move the stick on the joystick?
The numbers you see are what will be sent to the robot - the first number is telling the left motor what to do, and the second number is telling the right number what to do!
The higher the number, the faster the robot will move.
Scroll to the top of the joystick code, and change channel=7 from 7 to your robot's number (your two sets of code should now match), then flash the updated code to your micro:bit.
radio.config(channel=7, group=0, queue=1)
Finally, scroll down to the bottom of the joystick code - you are going to add a couple of lines to the code that is already there. Don't delete or repeat any of the code!
The code that is there already is doing the following:
while True:
        joystick = joystick_push()
        instructions = str(joystick[0]) + " " + str(joystick[1])
        print(instructions)
        sleep(10)
We're going to add one more instruction to this algorithm:
Add this line of code to the end, pay attention to the indentation.
radio.send(instructions)
A working example of the joystick code can be downloaded here.
Test your robot in the arena - does it move the way you expect?
How do you want to improve your robot?
At the end of the workshop you will get the chance to test your robotics skills by popping balloons in our arena, so spend the time you have wisely to make your robot as good as it can be!
The links below will help you with some of our ideas, or ask us for help to try out an idea of your own.