
Resources for the 'Creature Circuits' Creative Computing Club.
During this workshop, you will create and code a 'creature' using a BBC micro:bit, some conductive and insulating dough, and some electronic components.
To make your own dough at home, follow the instructions at Squishy Circuits.
This page recaps what we discussed as a group.
To skip to the examples and ideas, click here.
If you would like to do this activity using MakeCode instead, click here!
Go to the Python editor, then follow the instructions to pair your micro:bit.
You should see some starter code on your screen, like the below screenshot.
from microbit import * - imports the microbit library. It is necessary for the program to work, don't delete this line.while True: - Python's version of a forever loop - everything on the next few lines are inside this loop.: this says that we've finished creating a loop, and are ready to say what should happen inside it.display.scroll('Hello, World') - tells some text to scroll on the micro:bit's display - try changing the words inside the speech marks.display.show(Image.HEART) - tells an image (notice the capital I!) to show on the micro:bit's display - try changing HEART to a different image.sleep(2000) sets a pause of 2000 miliseconds (2 seconds) - this is how long the image will stay on the screen before the loop starts again.Adapt the starter code and test it on your micro:bit - what images can you find?
You can design your own images as well as using the built-in ones! Click here for instructions.
Inside your while True loop, type:
if button_a.was_pressed():
Anything that is indented underneath this, will happen only if the button is pressed.
Try this update to the starter code above:
while True:
  if button_a.was_pressed():
    display.scroll('Hello, World')
    display.show(Image.HEART)
    sleep(2000)
Challenge - can you make one thing happen when you press button A, and something else when you press button B?

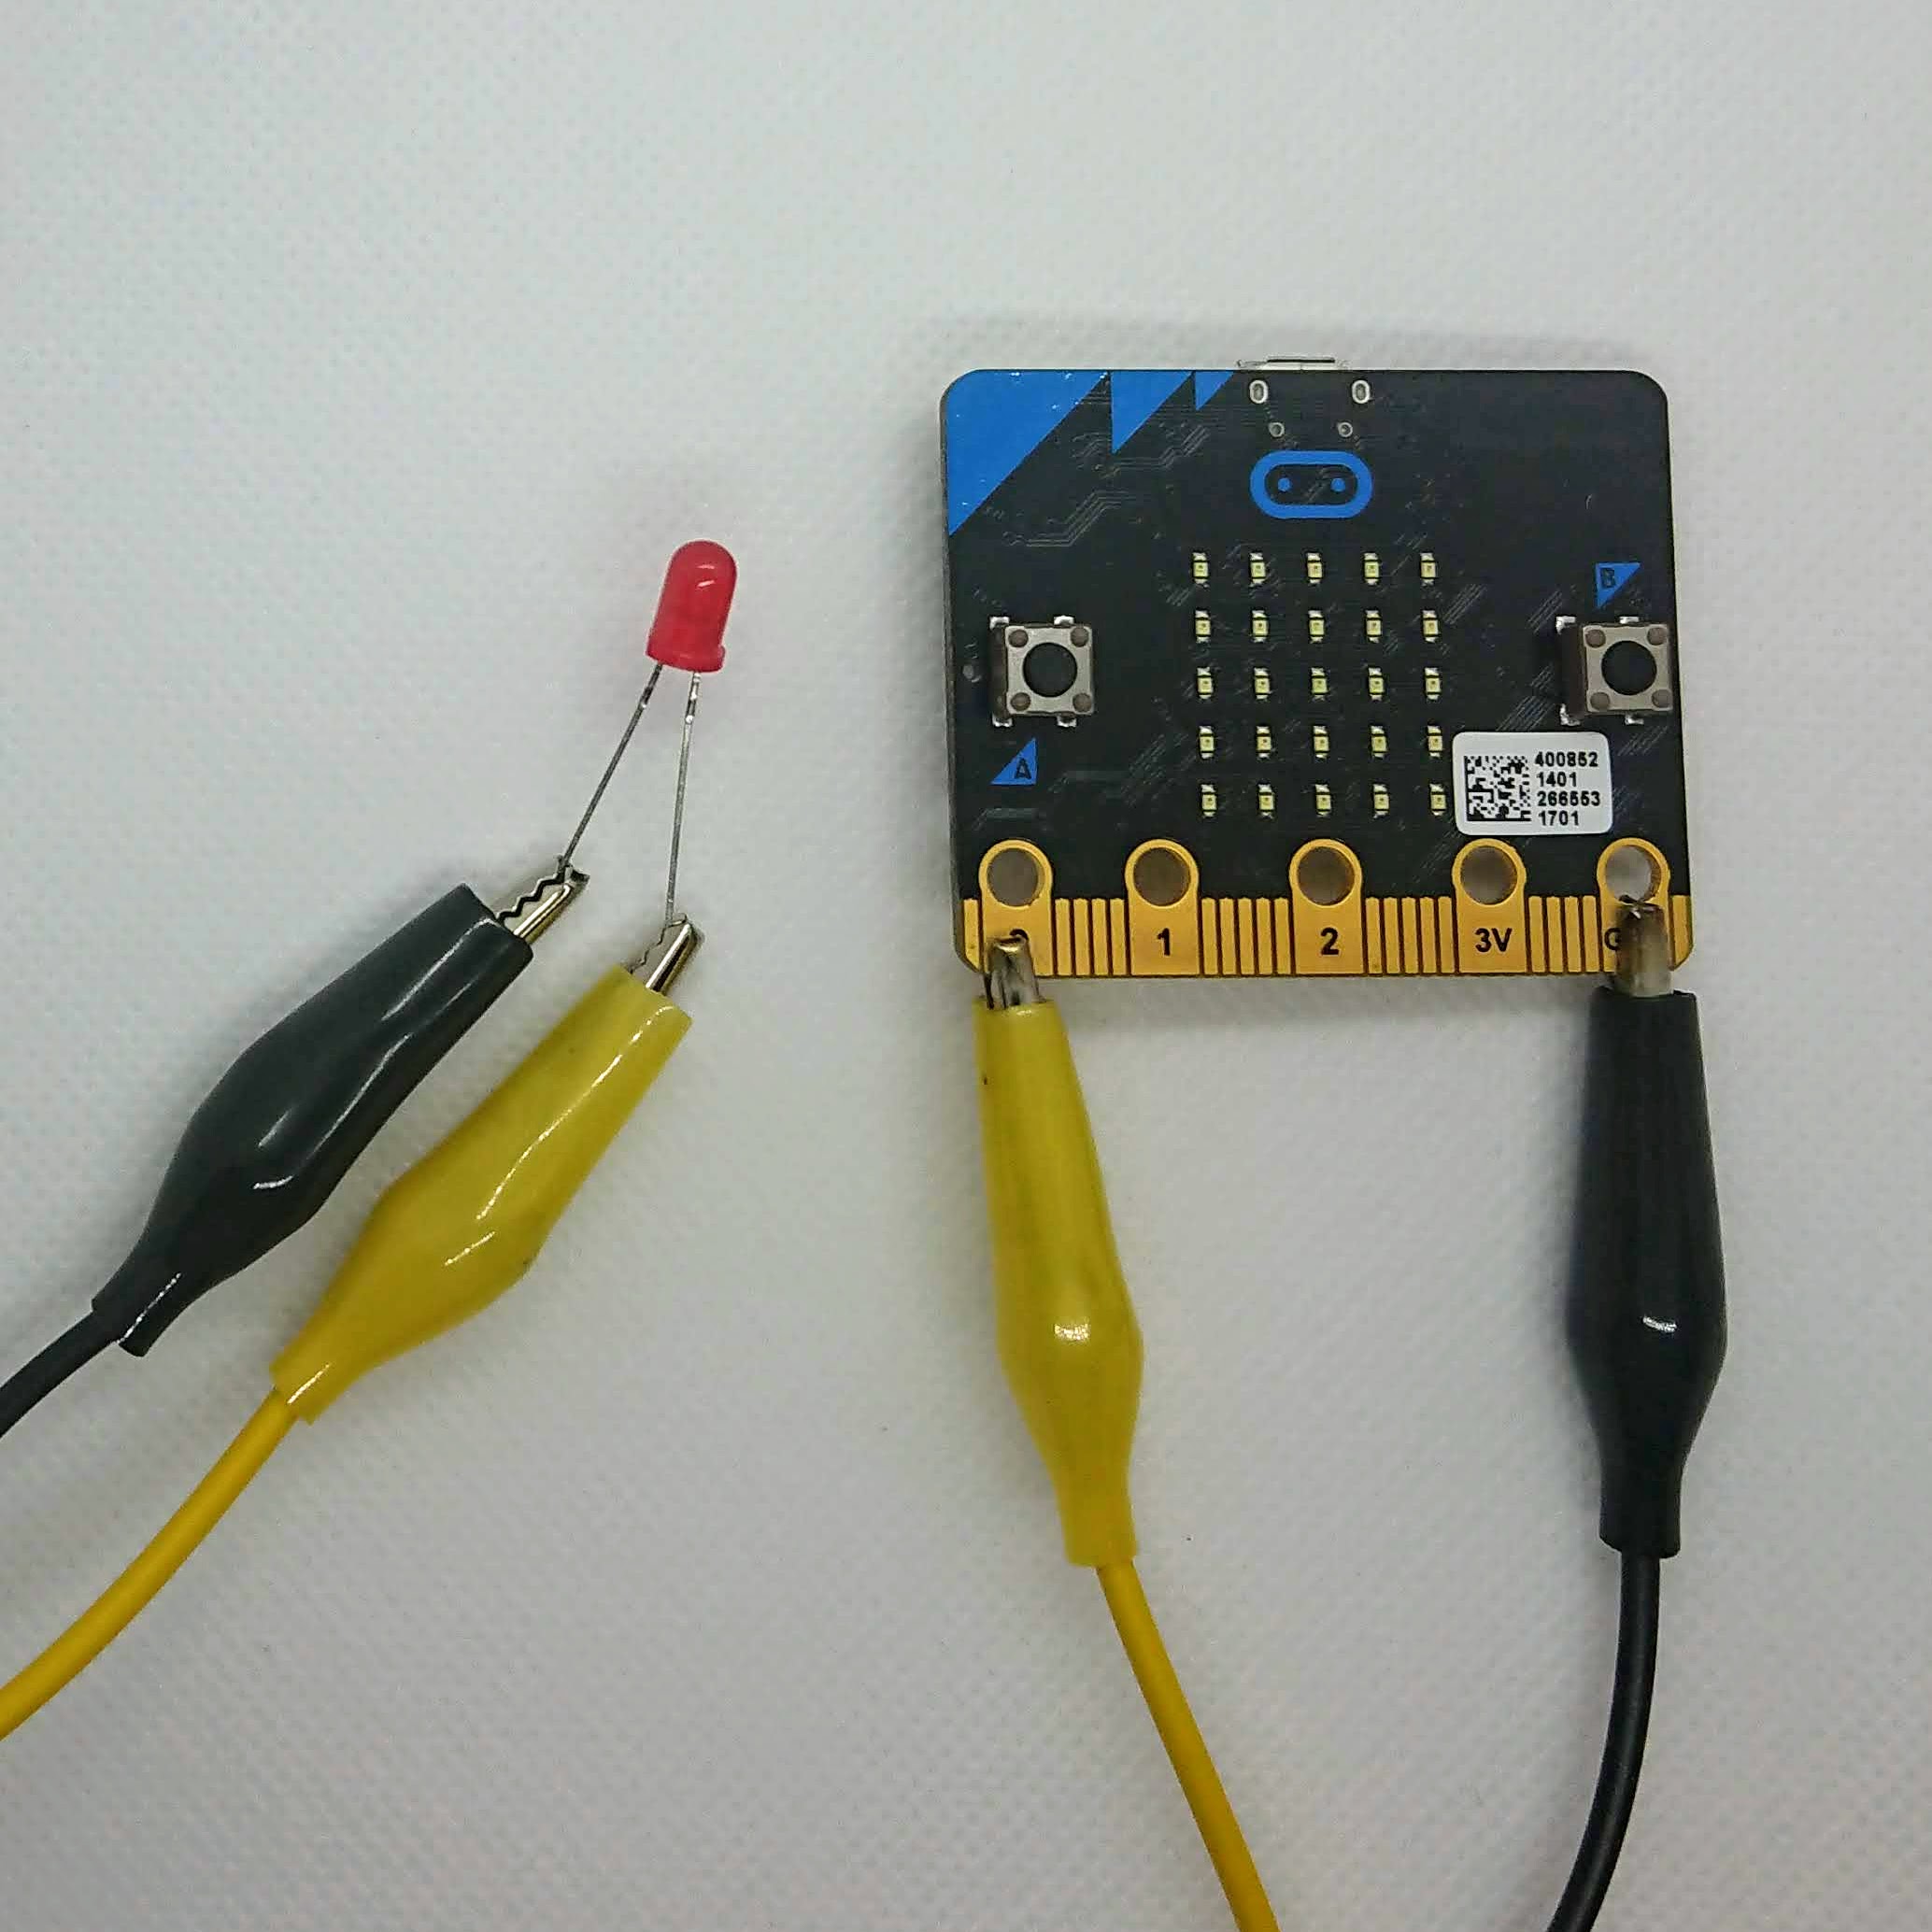
Take a crocodile clip, and connect one end of it to pin 0 on your micro:bit.
Connect the other end of your crocodile clip to the positive lead of your LED (the longer one).
Connect a second crocodile clip between the GND pin on your micro:bit, and the negative lead of your LED (the shorter one).
Now add the below code into your while True loop (remember your indentation!)... what happens to your LED?
  pin0.write_digital(1)
  sleep(500)
  pin0.write_digital(0)
  sleep(500)
What would you need to change in the code if you connected the LED to pin 1 or 2 instead of pin 0?
When you have created your dough creature, you can add some extra features. The links below will help you with a couple of our ideas!