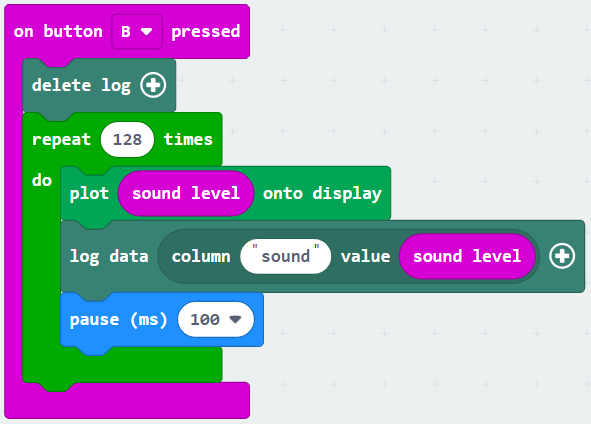
After adding the code, as shown below, the process for getting your data off the micro:bit is a bit tricky!
This extension only works with V2 micro:bits.
Click Extensions from the menu, and choose the datalogger option.
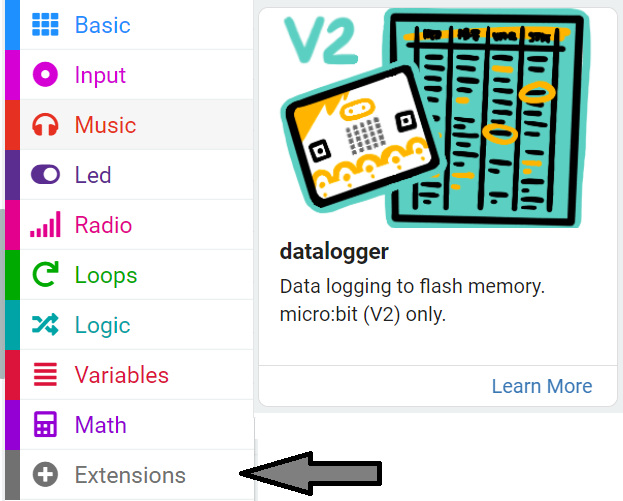
You will now have an extra section in your menu called Data Logger.
Add two new blocks of code from the Data Logger menu, as shown below.
Each time you change your code, or want to get new data - follow these instructions.
The next part will power off the OLED screen, so take a photograph of the graph if you want to.
Do not run your data collection code again, this will delete the earlier data.
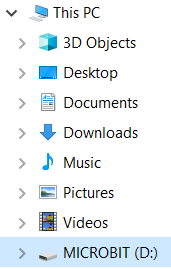
Your log will be deleted each time you run the code, so if you want to keep it click Download to save a .csv file.
Whenever you make changes to your code, or run your data collection code again, the table will change - follow the instructions above each time to get your latest data.