
Resources for the 'Shine Design' Creative Computing Club.
During this workshop, you will create a light-up design to decorate the Science Oxford Centre for the Oxford Light Festival.
This page recaps what we discussed as a group.
To skip to the examples and ideas, click here.
Open the Mu editor on your computer. If there is code on the screen, start a New program from the menu.

Type these two lines of code into your blank window:
from microbit import *
display.show(Image.HAPPY)
Plug your micro:bit into the computer, then click Flash:

Some code should be running on your micro:bit!
If you get a message scrolling across the micro:bit's screen, this is an error message!
Debug your code, then click Flash again to test your changes.
Once your code is working - change it!
Instead of HAPPY, can you think of another Image the micro:bit could show on its display?
The 'teeth' on the bottom of the micro:bit allow you to add extra components to your designs.
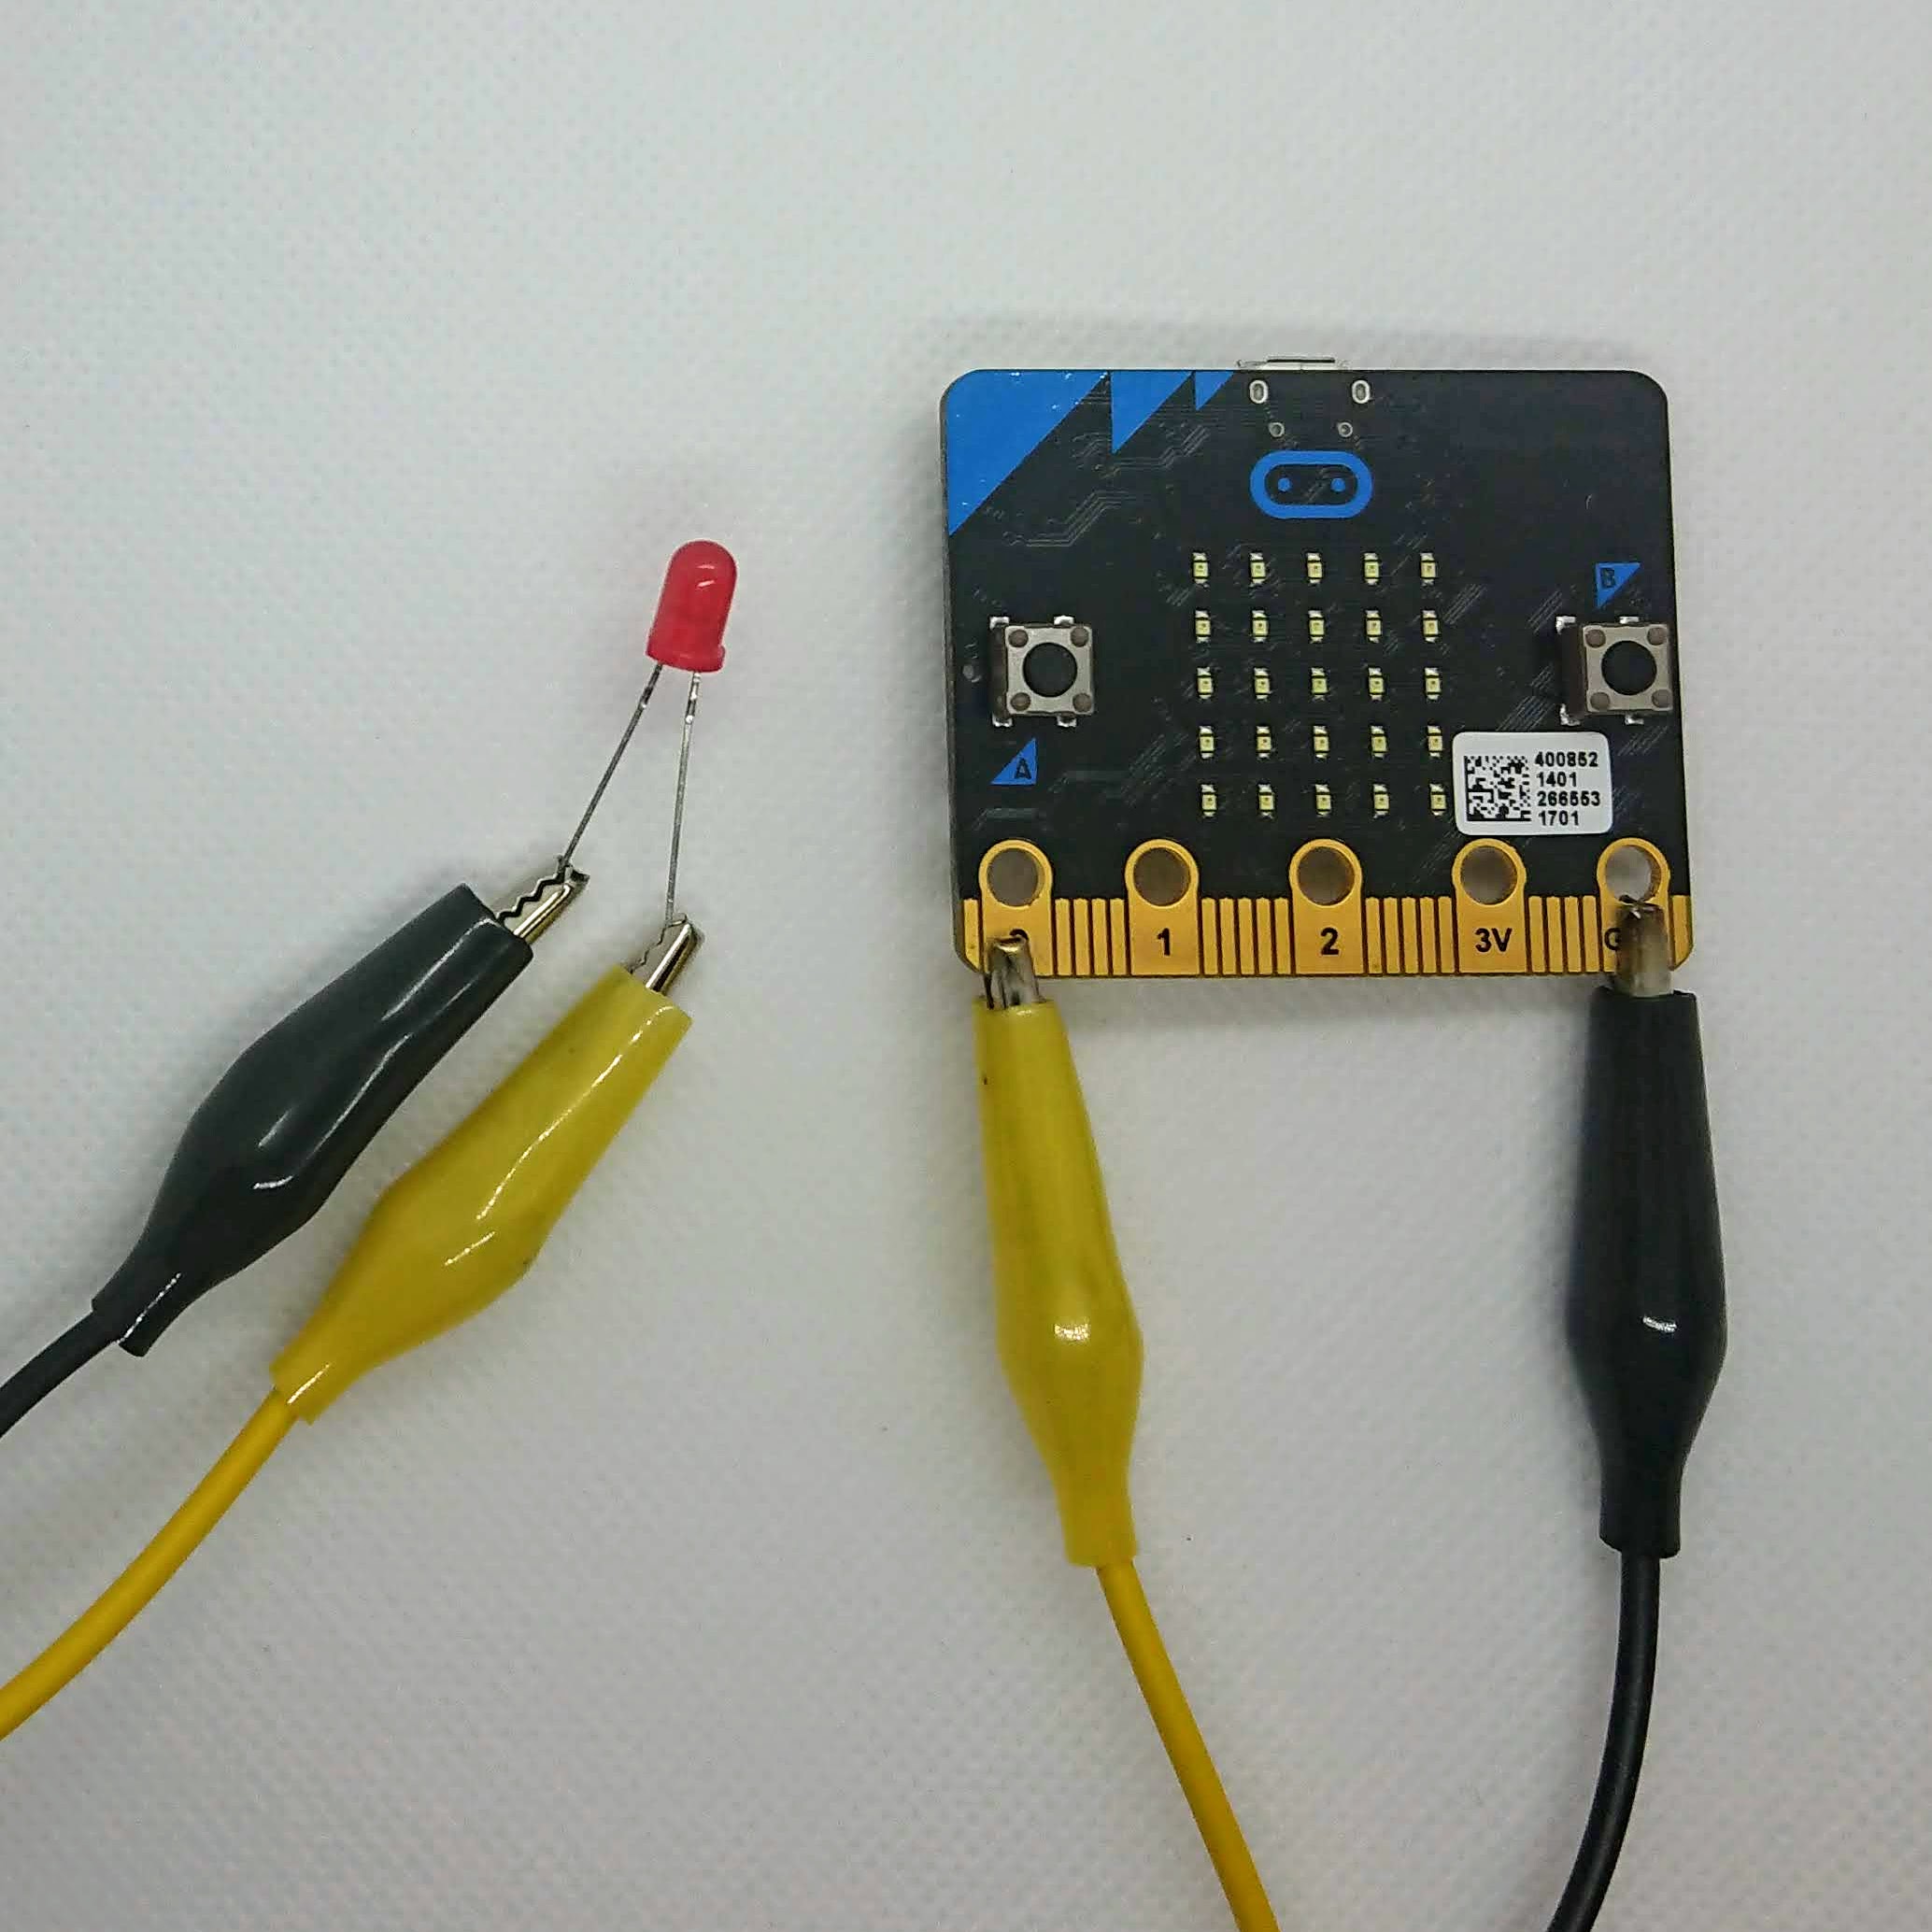
To start with, we will add a single LED.

Take a crocodile clip, and connect one end of it to pin 0 on your micro:bit.
Connect the other end of your crocodile clip to the positive lead of your LED (the longer one).
Connect a second crocodile clip between the GND pin on your micro:bit, and the negative lead of your LED (the shorter one).
Add the below code to your micro:bit program, underneath everything you have done so far... what happens to your LED?
while True:
    pin0.write_analog(1023)
    sleep(500)
    pin0.write_analog(0)
    sleep(500)
1023?With a regular LED, you must choose a single colour.
An RGB LED has four legs, and is three LEDs in one. You can mix the colours to make any colour you want.
Disconnect your previous LED from the crocodile clips - leave them attached to the micro:bit though.
Find the long leg of the RGB LED, this one is the negative, and connect the crocodile clip attached to your micro:bit's GND pin to it.
Use your other crocodile clip to test out the three legs of the LED - which leg makes which colour?
Get two more crocodile clips and connect them up so that pins 0, 1 and 2 on the micro:bit all have a clip.
Connect up your LED so that:
Now that we have three colours in one, the code will get more complicated.
To make it easier to see what is going on, we are going to use variables to rename the micro:bit's pins (0, 1, 2) to the colours they are attached to.
Add the following lines of code to your program, before the while True loop:
red = pin0
green = pin1
blue = pin2
Inside your while True loop, your current code turns pin0 on and then off again. Change pin0 to red and flash your code to your micro:bit - does the RGB LED flash red?
Your code should look something like this so far:
from microbit import *

red = pin0
green = pin1
blue = pin2

while True:
    red.write_analog(1023)
    sleep(500)
    red.write_analog(0)
    sleep(500)
Expand your code to add the two other colours, like this:
from microbit import *

red = pin0
green = pin1
blue = pin2

while True:
    red.write_analog(1023)
    green.write_analog(1023)
    blue.write_analog(1023)
    sleep(500)
Now experiment!
What different colours can you make by changing the brightness of the red, green and blue lights?
Now that you know how to connect lights to a BBC micro:bit, your imagination (and our supplies!) is your limit.
The links below give you some other ideas of things you could add to your design.