Resources for the 'Hot or Code? Winter Warmers' Creative Computing Club.
During this workshop, you will create a cosy winter project using a BBC micro:bit, lighting it up in the dark and checking the temperature of hot drinks.
This page recaps what we discussed as a group.
To recap the torch, click here.
To recap the temperature sensor, click here.
To skip to the examples and ideas, click here.
Download the starter code, go to the editor, and drag-and-drop the starter code into the window.
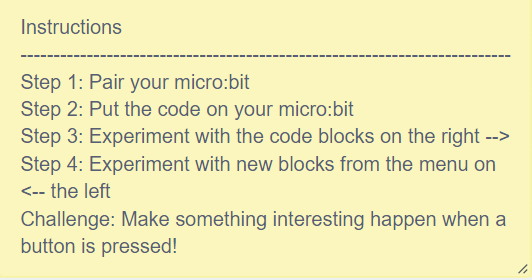
Follow the instructions to pair your micro:bit and create your first program!
To make the micro:bit respond to the light levels, you need to create an 'if then else' statement.
if the light level is high, then make something happen, else make something different happen.
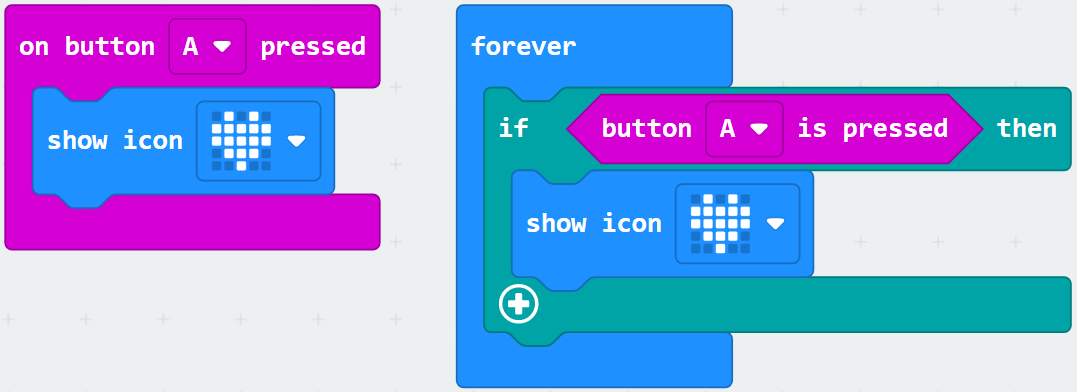
These two blocks of code are equivalent.
The one on the right makes it easier to build more complex programs.
Using the code on the right, at the moment a heart will show on the micro:bit's display if button A is pressed.
Add to it, by clicking the + button at the bottom.
Make something different happen when the button is not pressed (else), for example clear the screen.
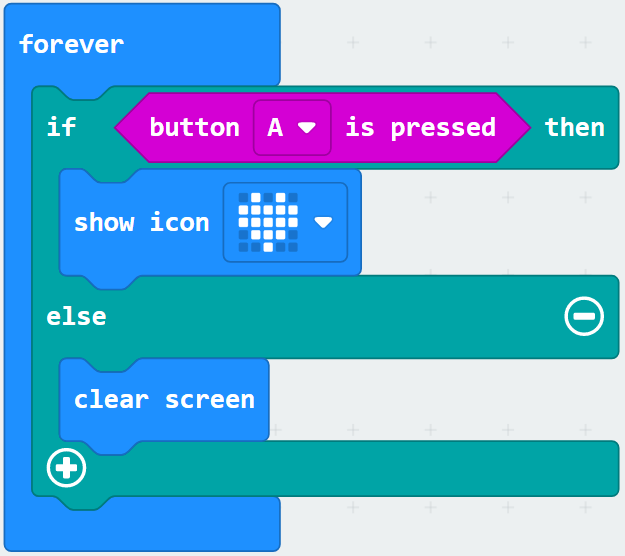
Now, you should see a heart when you click the button, and it will go away again afterwards. You can add a pause block after the icon to make it stay for longer!
Finally, update the code blocks so that the heart is displayed dependent on light level, instead of on a button press.
You can find the less than block in the Logic menu.
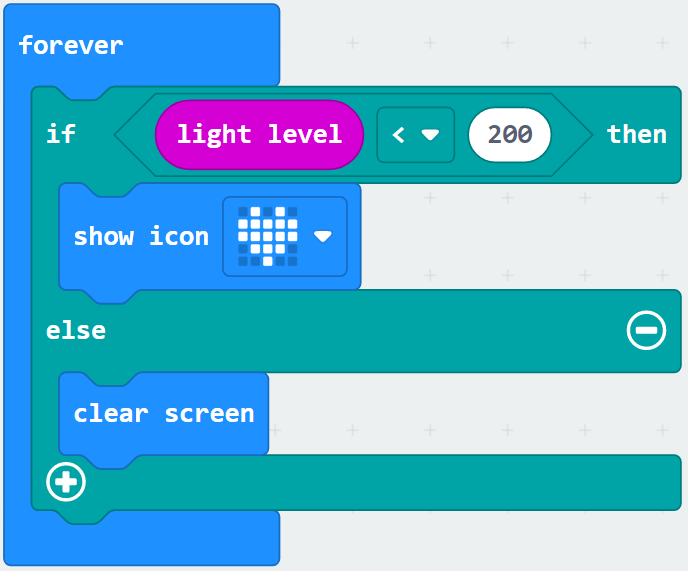
Decide what you want to happen when the light is low, and edit the code.
Experiment with your physical micro:bit to see what is a good number to set the light level to - try covering the screen with your hand, or putting the micro:bit under your table!
Using the temperature sensor is very similar to using the light sensor!
Right click on your light level if-then-else block, and duplicate it.
Put the copy of the code underneath the code that is already there, still inside your forever loop.
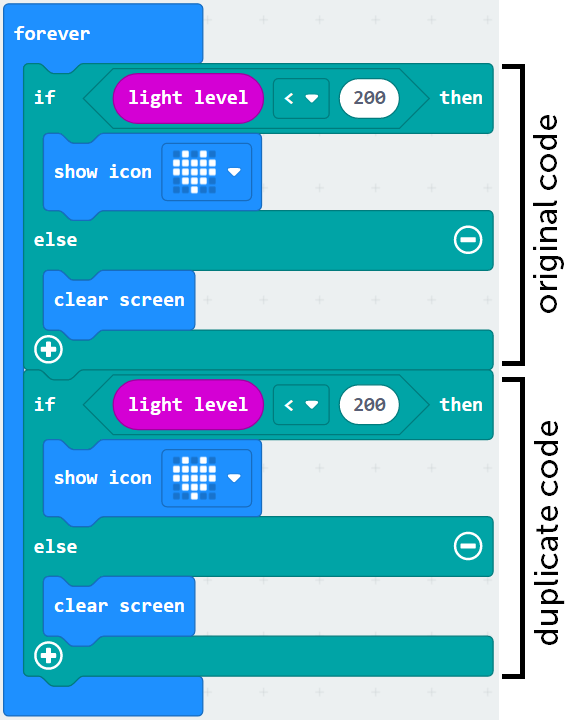
Change the light level block to a temperature block, then change the number to something more appropriate - have a look at the emulator's temperature gauge!
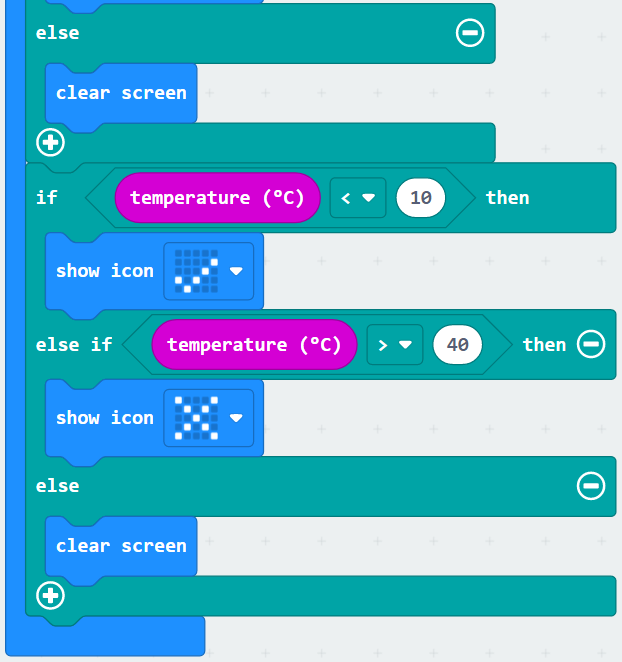
Edit the code in this new if-then-else block to decide what happens when the temperature is too low.
You can add extra options to your if-then-else block to make one thing happen if the temperature is too low, and something different happen if the temperature is too high!
Get creative and add different features to your micro:bit.
The links below will help you with a couple of our ideas!