Resources for the 'Code Adventure' Creative Computing Club.
During this workshop, you will write and program a 'Choose your own Adventure' style story using Twine.
This page recaps what we discussed as a group.
To jump to the section on changing colours, click here.
To skip to the examples and ideas, click here.
Getting started
Visit: twinery.org/2
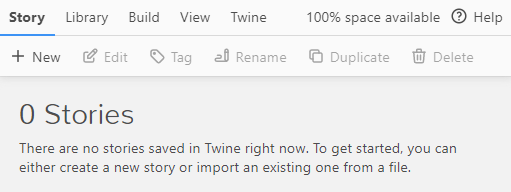
You should see a screen like the below picture. If you get a welcome message first, click 'skip'.
To continue working on a saved project (for example from our in-person workshop), click Library -> Import, then upload your saved file.
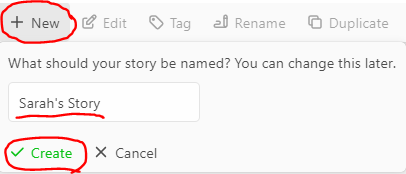
Click the + New button on the top left and type in a title, then click ✓ Create.
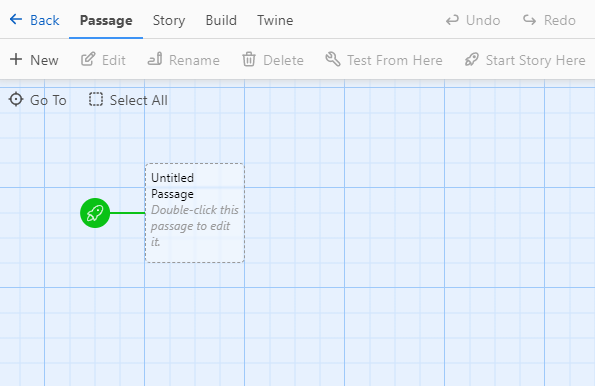
You should now see a screen like the below picture:
Beginning your story
Double click on the Untitled Passage - this will be the opening paragraph of your story!
Write a sentence to set the scene, then decide on a couple of options your reader can choose from.
Write your options in double square brackets [[choice]], and new passages will be created and automatically linked to your first paragraph!
Click the x in the top right corner when you have finished editing the passage.
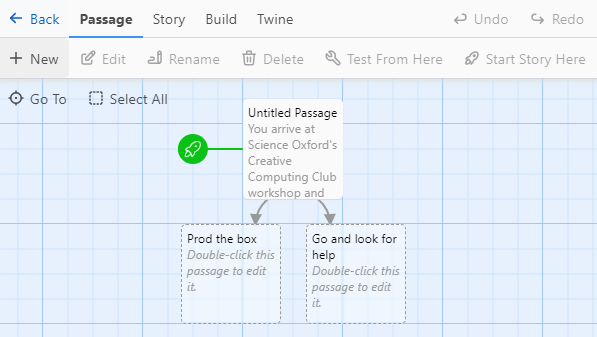
Example:
You arrive at Science Oxford's Creative Computing Club workshop and notice that something isn't right...
Instead of a laptop on each desk, there is a strange square box!
[[Prod the box]]
[[Go and look for help]]
Now test your story!
Click on your first passage (the box with the rocket icon), then click the 🔧 Test From Here button on the menu at the top.
This should open your story in your web browser. Click on your options to test that they work.
Go back to the Twine editor, to carry on creating your story.
Saving your story
To make sure that you do not lose your work, download your work regularly.
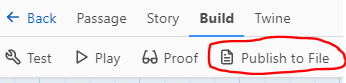
Save your story to your computer by clicking Build, then Publish to File from the top menu.
This will save it on your computer - probably in your downloads folder.
Do this any time you make significant changes!
Changing colours
To change the colours, and other formatting such as fonts, we are going to use CSS and edit the stylesheet, which can be found by clicking Story then # Stylesheet in the menu.
Anything you add in here will change the formatting for your story - add things one at time, close the stylesheet, then check your story using the Play button.
If you make lots of changes at the same time, it can be very difficult to debug any problems!
Example 1:
tw-story{
  color: #fcba03;
}
The example code above will change the text colour of your story to a mustard yellow colour.
tw-story{} means 'Twine story'. Anything inside the curly brackets {} will apply to your whole story.color: means edit the text colour. Note the American spelling of 'color' with no u, and the colon : at the end.#fcba03; is the 'hex code' of my chosen colour. The semi-colon ; at the end means that you have finished giving an instruction.
Click here to find colour hex codes.
Example 2:
tw-story{
  background-color: #fcba03;
}

tw-passage{
  color: #000000;
}

tw-link{
  color: #249140;
}
The example code above will change the background colour of your story to a mustard yellow colour, the paragraph text to black, and the link text to dark green.
tw-story{} means 'Twine story'. Anything inside the curly brackets {} will apply to your whole story.tw-passage{} means 'Twine passage'. Anything inside the curly brackets {} will apply only to your paragraph text.tw-link{} means 'Twine link'. Anything inside the curly brackets {} will apply only to your links (your text inside double square brackets).
Click here to find colour hex codes.